

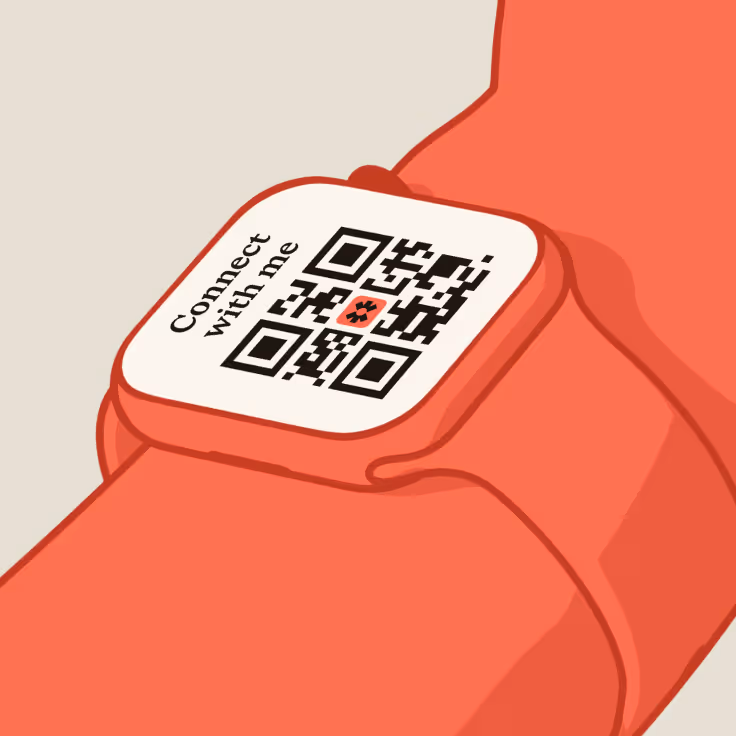
.avif)


.avif)
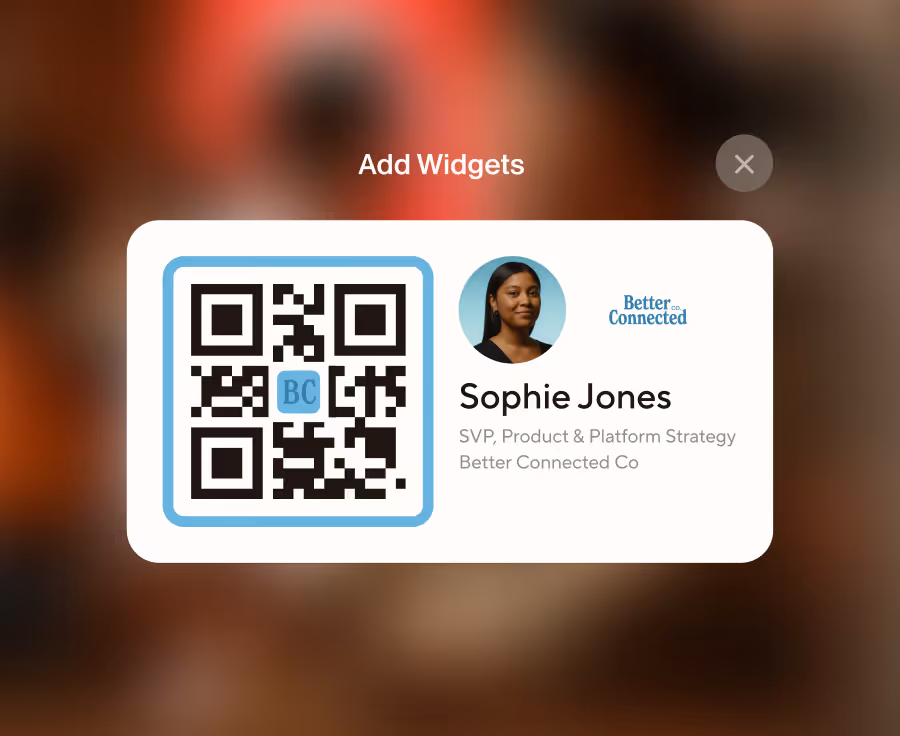


.avif)


Don’t worry, you’re not the first person to ever wonder how to create an email signature. You also won’t be the last. Considering email signatures are one of the ways we promote and present ourselves to our network, including potential clients, it’s surprising how many professionals don’t know how to make the most of them.
If you’re considering using an email signature designed and managed with Blinq, we can show you exactly how to create one with all the different elements possible on our platform. But that’s only the start. You’ll no doubt also want to know how to create and manage your Blinq email signature in Gmail, Outlook, or Mail. We can also help you with that, providing step-by-step guides for all the above in this article.
Key Takeaways (TL;DR)
- You can create an email signature with Blinq online in minutes
- Blinq provides easy email signature management through an online dashboard
- Individual signatures can be created for free, while flexible payment plans are available for companies
- Blinq email signatures can be integrated with Gmail, Outlook, and other platforms
- Blinq is the top-rated email signature software on G2
- Every time you update your email signature on Blinq, it updates automatically on Gmail, Outlook, and Mail accounts
Step-By-Step Guide on Creating a Professional Blinq Email Signature
Follow this guide to create your first email signature with Blinq. If you want to set up signatures for your entire organization, consult our pricing page to learn about the different payment plans and their inclusions.
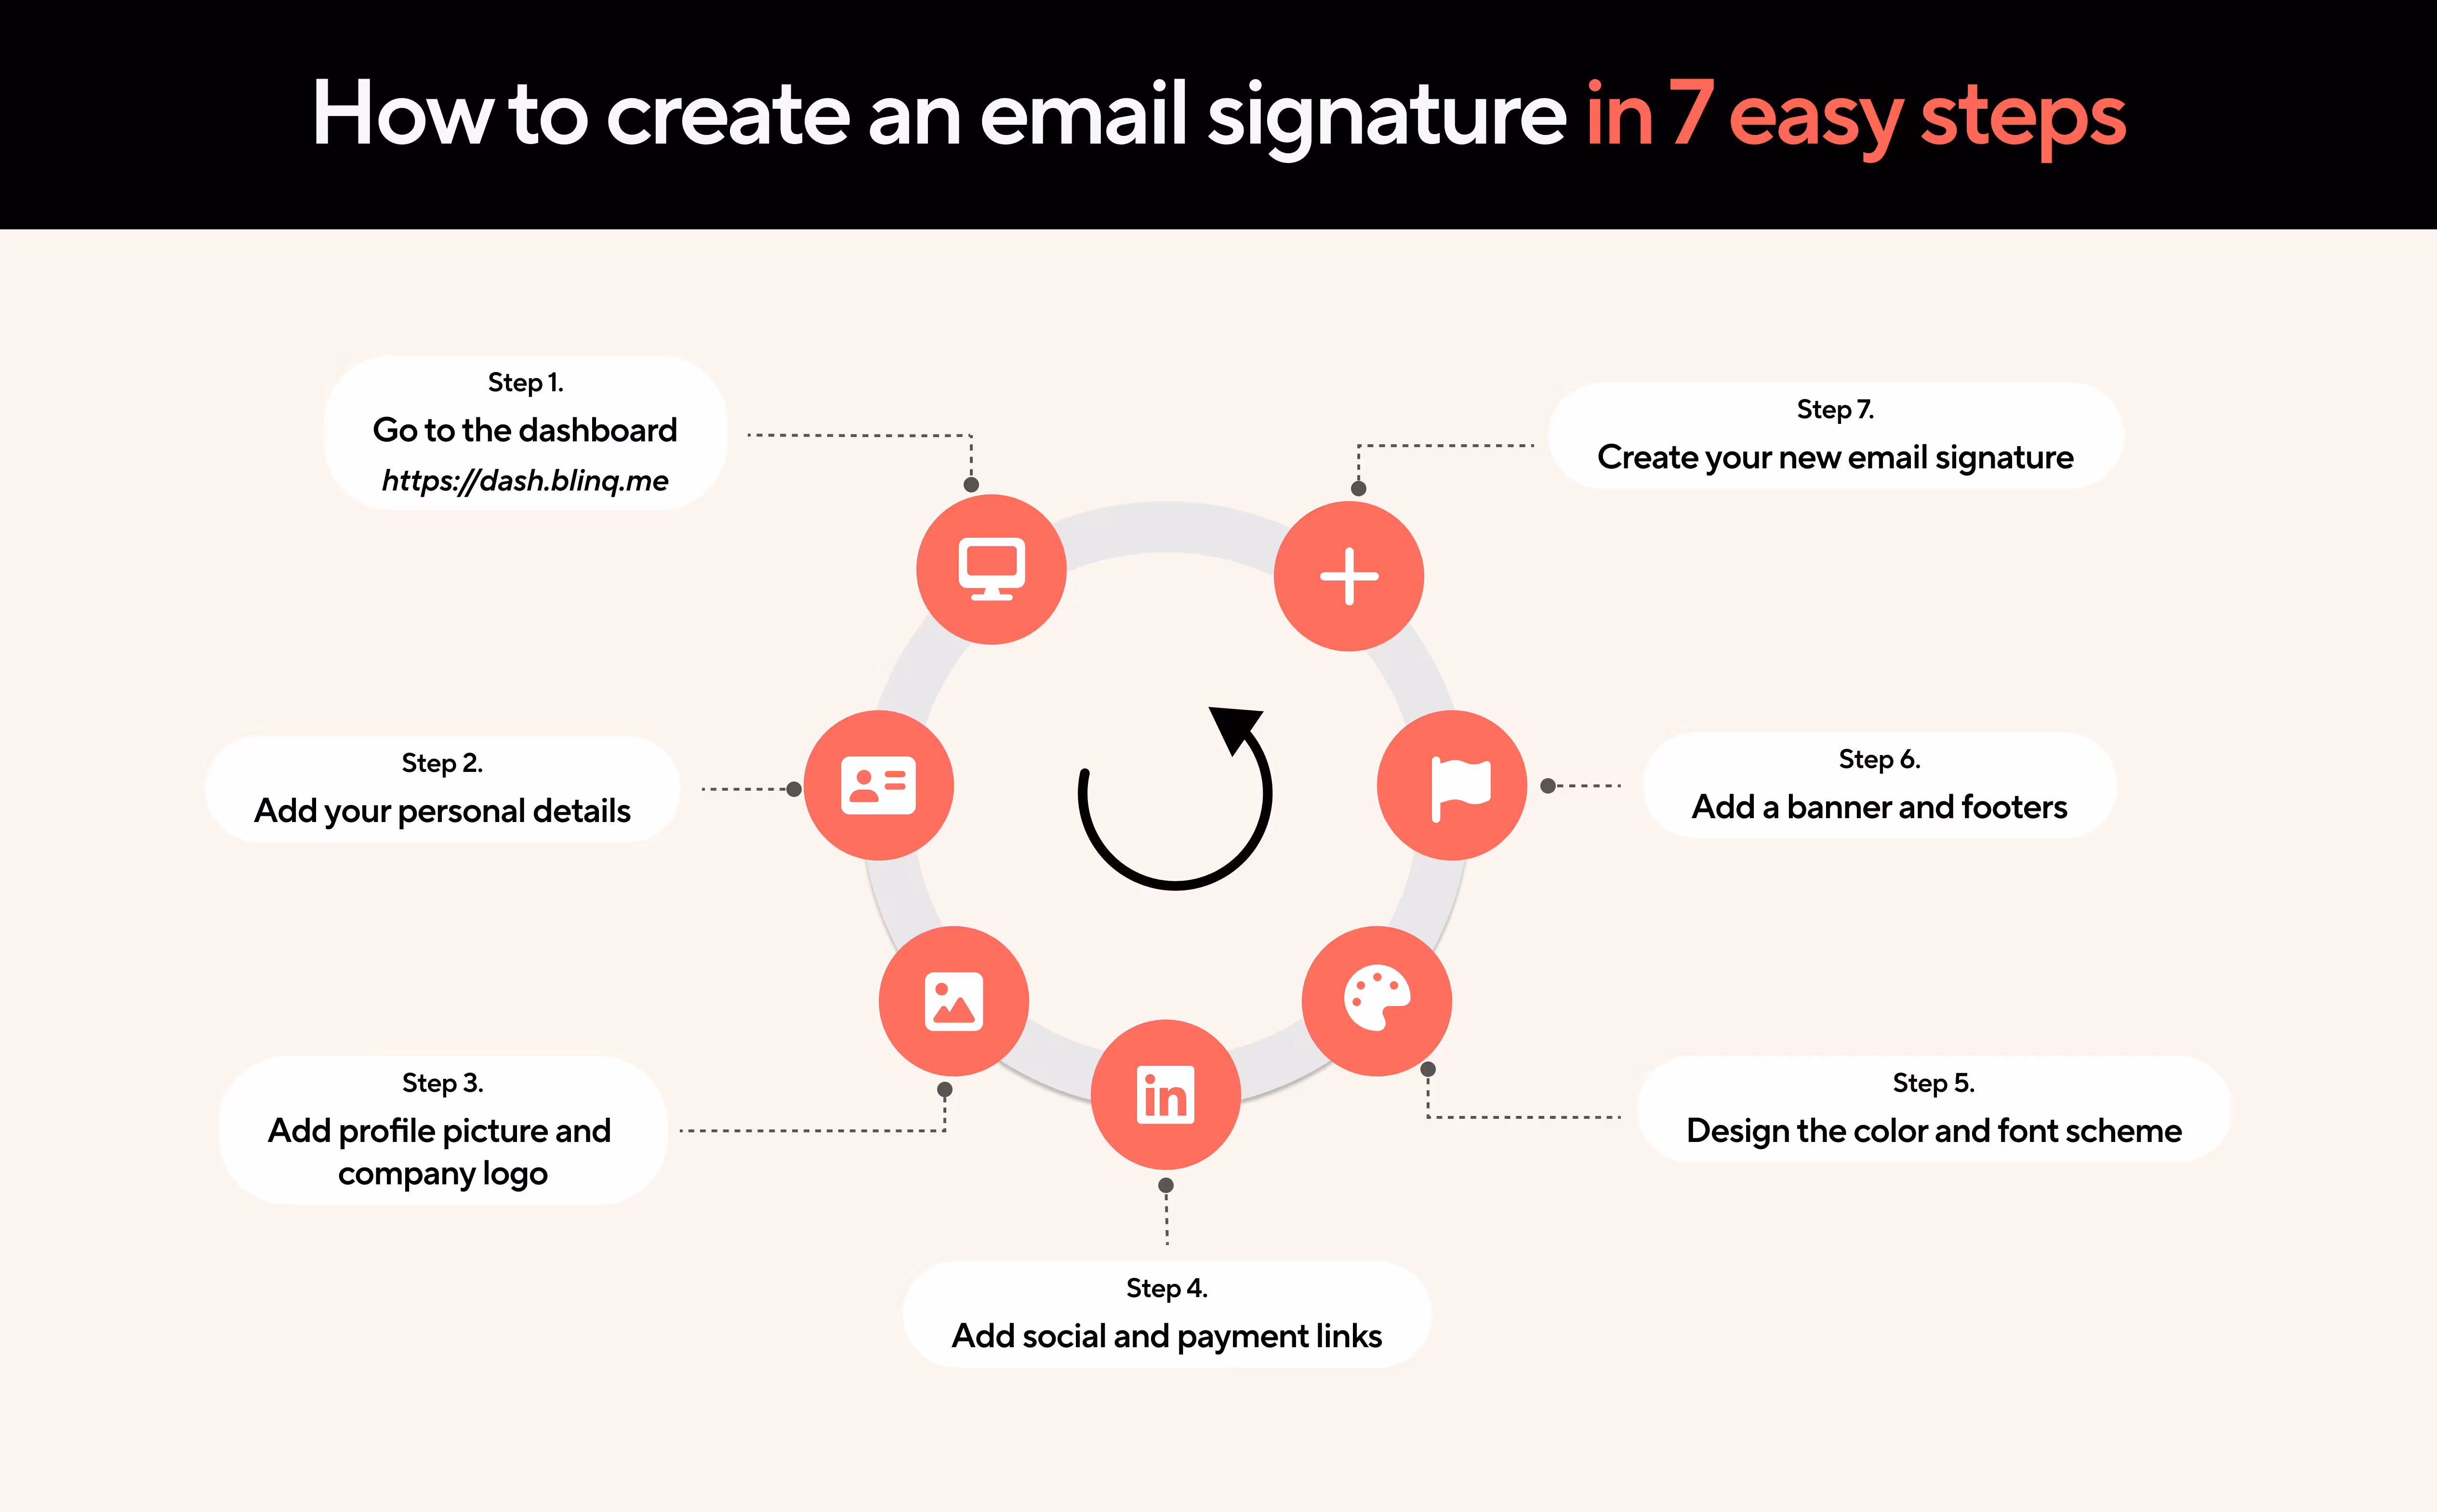
Step 1: Dashboard
Go to the Blinq email signature creator dashboard to personalize your signature.
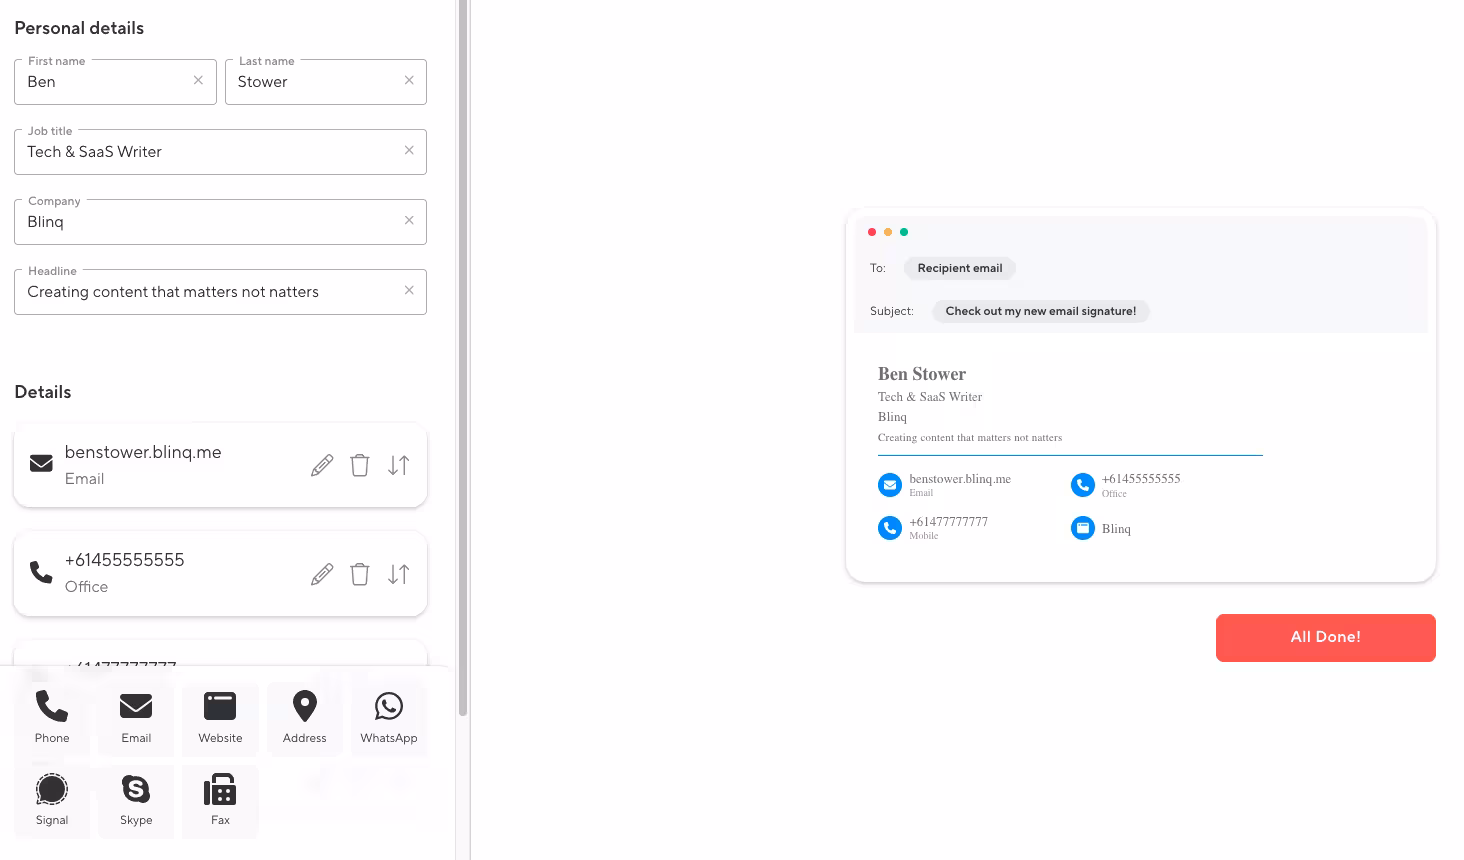
Step 2: Personal Details
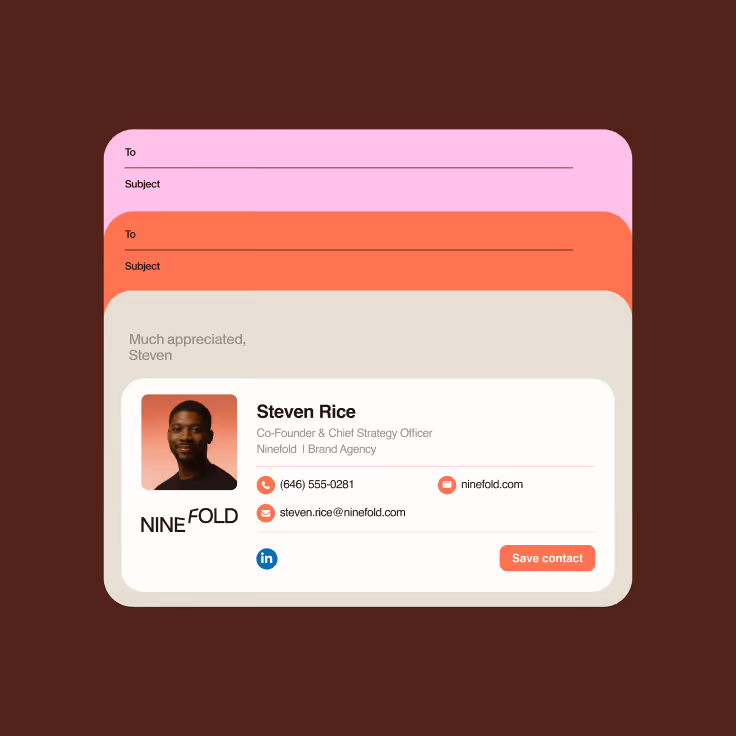
Add your personal details to your email signature, including your name, job title, company name, and a headline. You can also add different contact options, such as your phone number, email, website, address, WhatsApp, Skype, and fax. As you add different details, they’ll appear on the example signature displayed on the right side of your screen.
You can add optional labels to your email and phone number for clarity. This can be helpful if you want to include multiple emails or numbers for different services. Adding a title to your website can also make your signature more professional and client-facing.
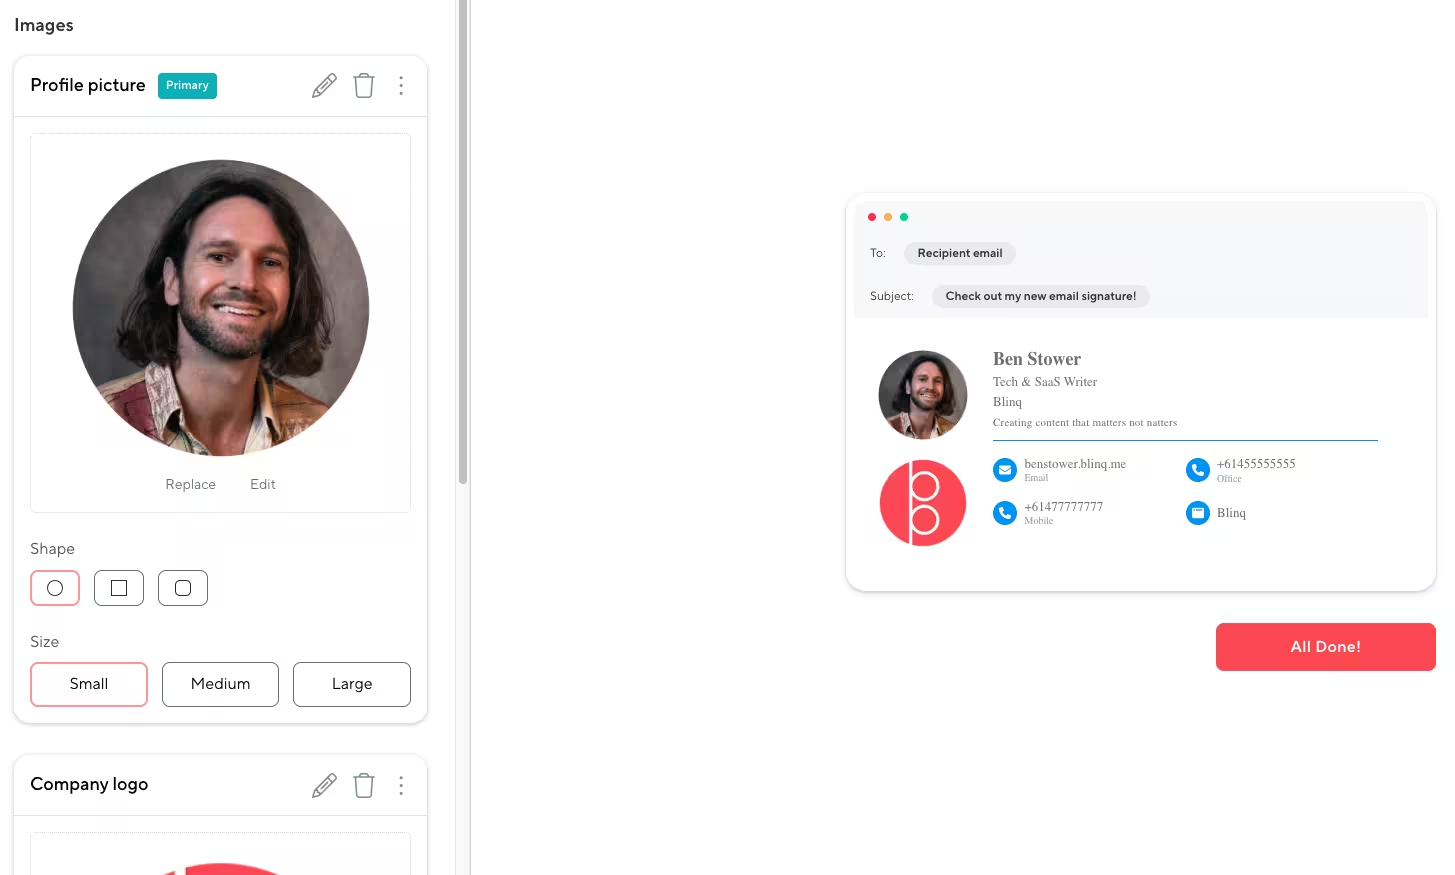
Step 3: Images
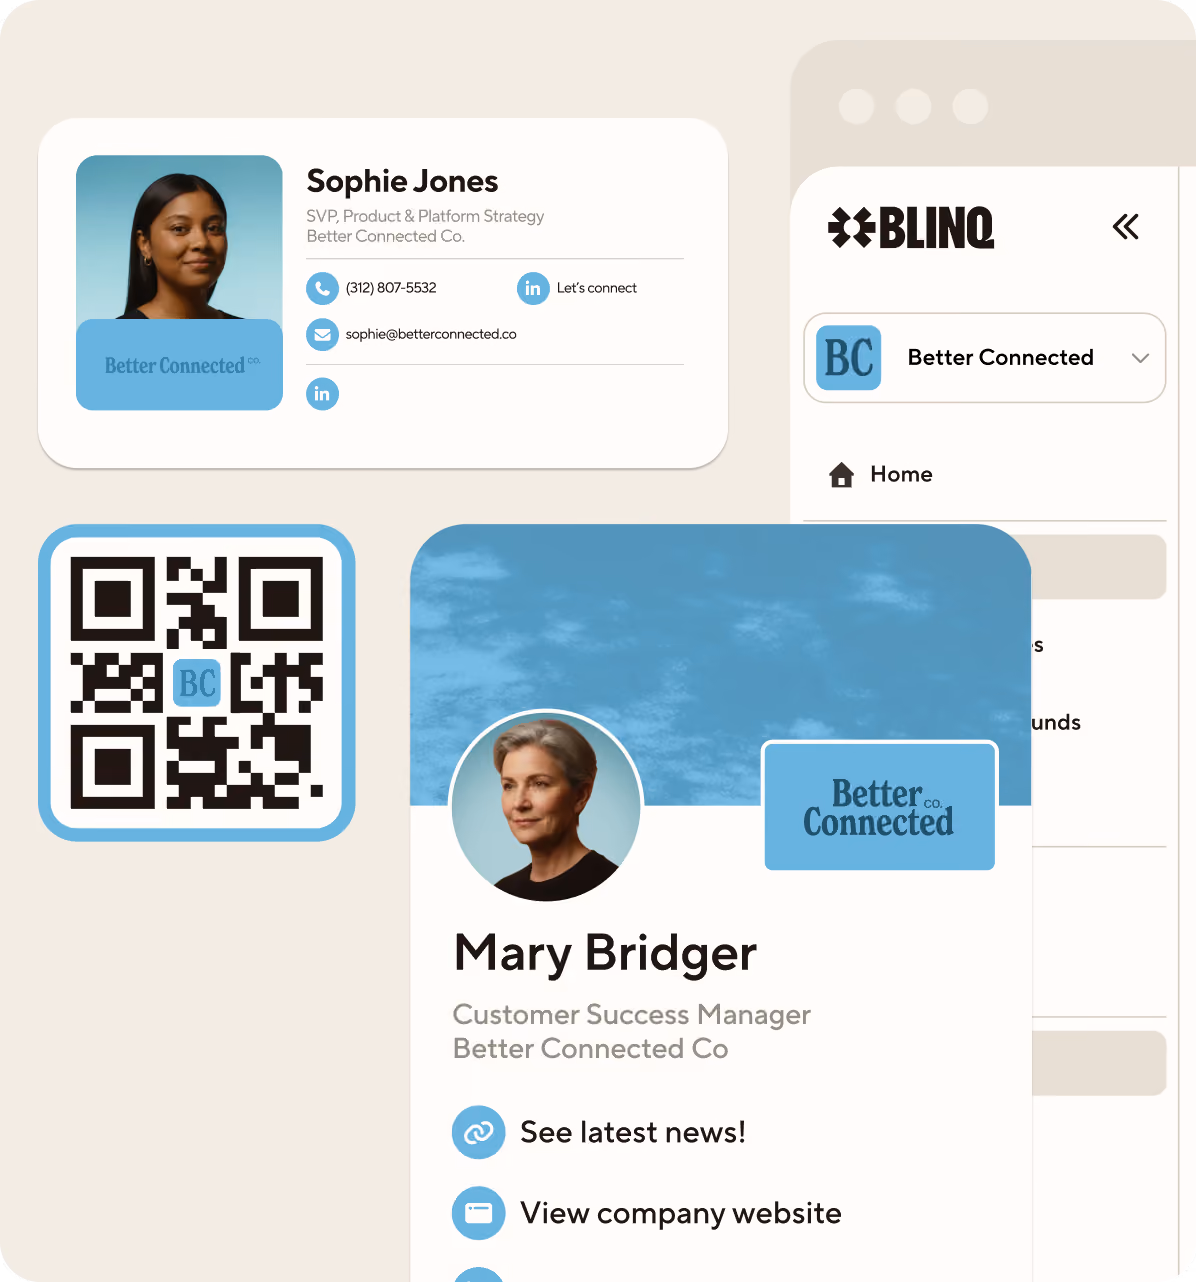
One of the best parts about a dynamic email signature with Blinq is the ability to easily add images, such as your LinkedIn profile photo or a company logo. All you need to do is upload them to the dashboard. From there, you can tweak the style, size, and shape to better suit your desired aesthetic. You can see how I’ve done this below, choosing a circular shape that matches my design.
You just need to make sure your images are in JPG, JPEG or PNG format so they can be uploaded. You can also choose whether your company logo or profile photo appears first in your signature. Keep in mind you can only include two images max in your email signature. Any more and it might appear cluttered.
Step 4: Links
Do you have social channels or payment or review platforms you’d like to promote? Good news, you can add as many of these as you’d like to your Blinq email signature. This is one of the ways you can better utilize email communication as another marketing channel, showing up more consistently for prospective or current clients. Having these links can also help any email recipients connect with you faster.
If you can, we recommend adding at least four links to your email signature. As you can see below, the logos stand out with their branding colors. Their style and coloring can also be changed in the next step.

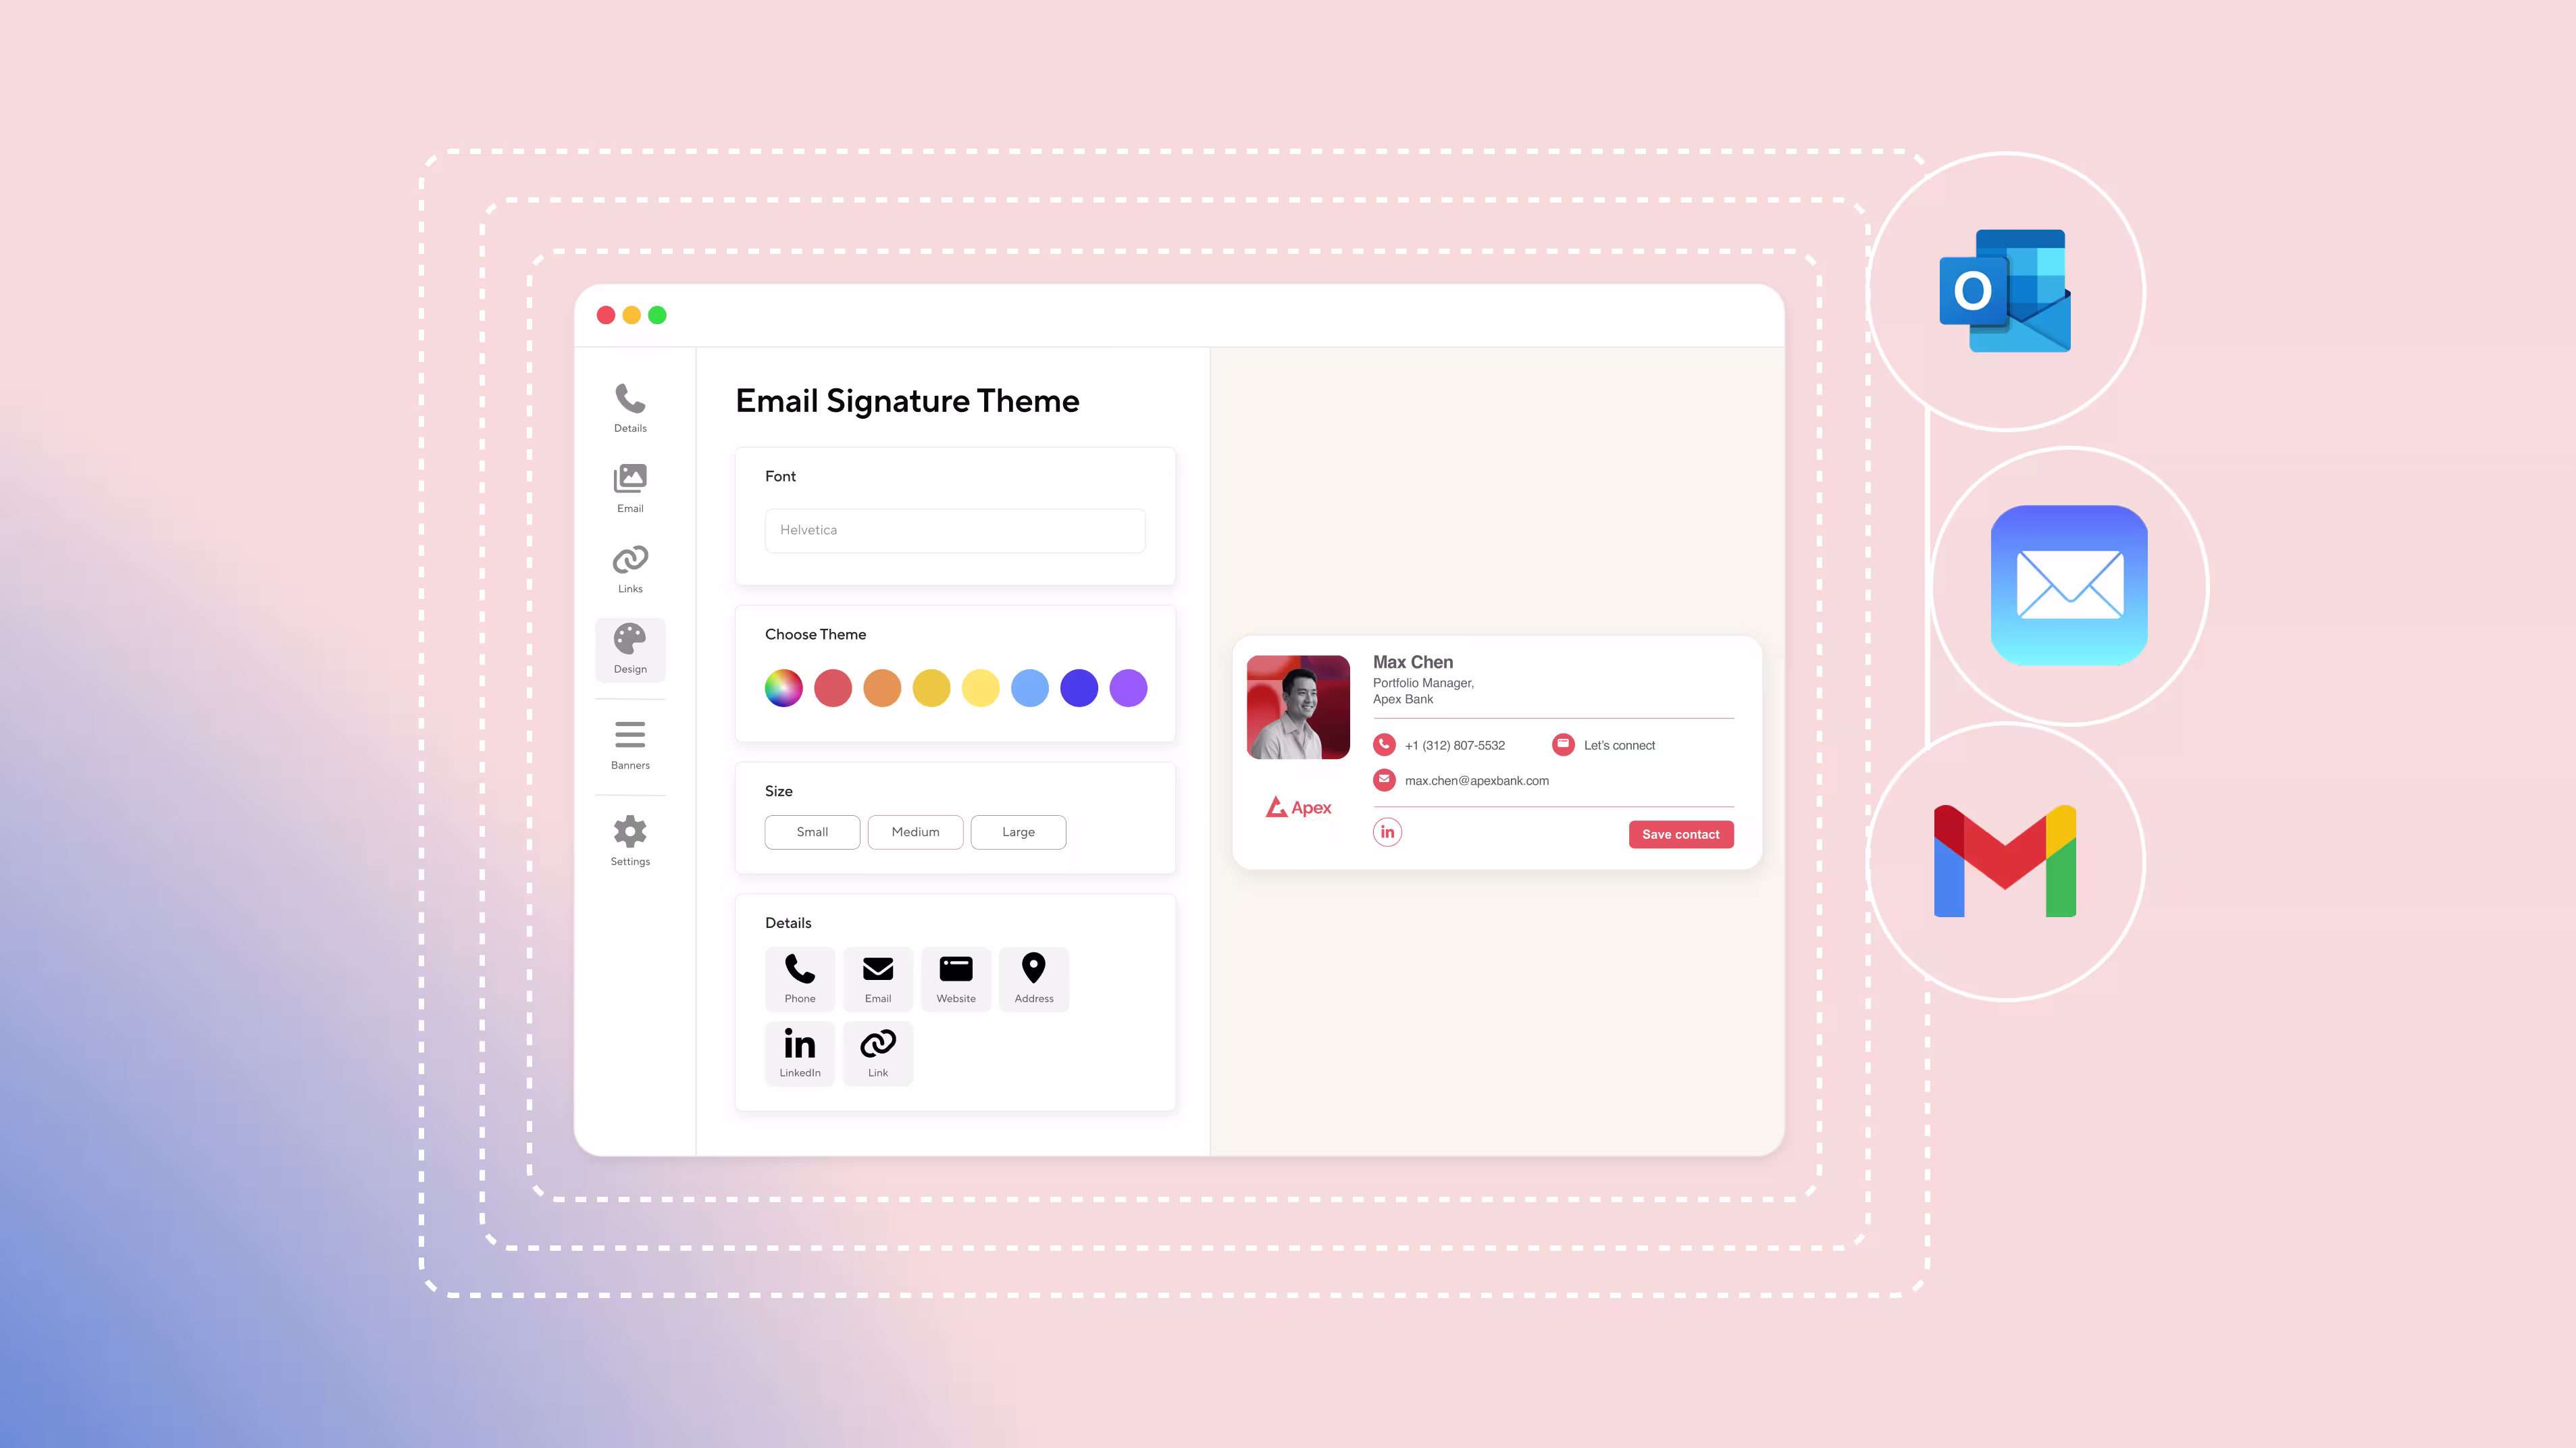
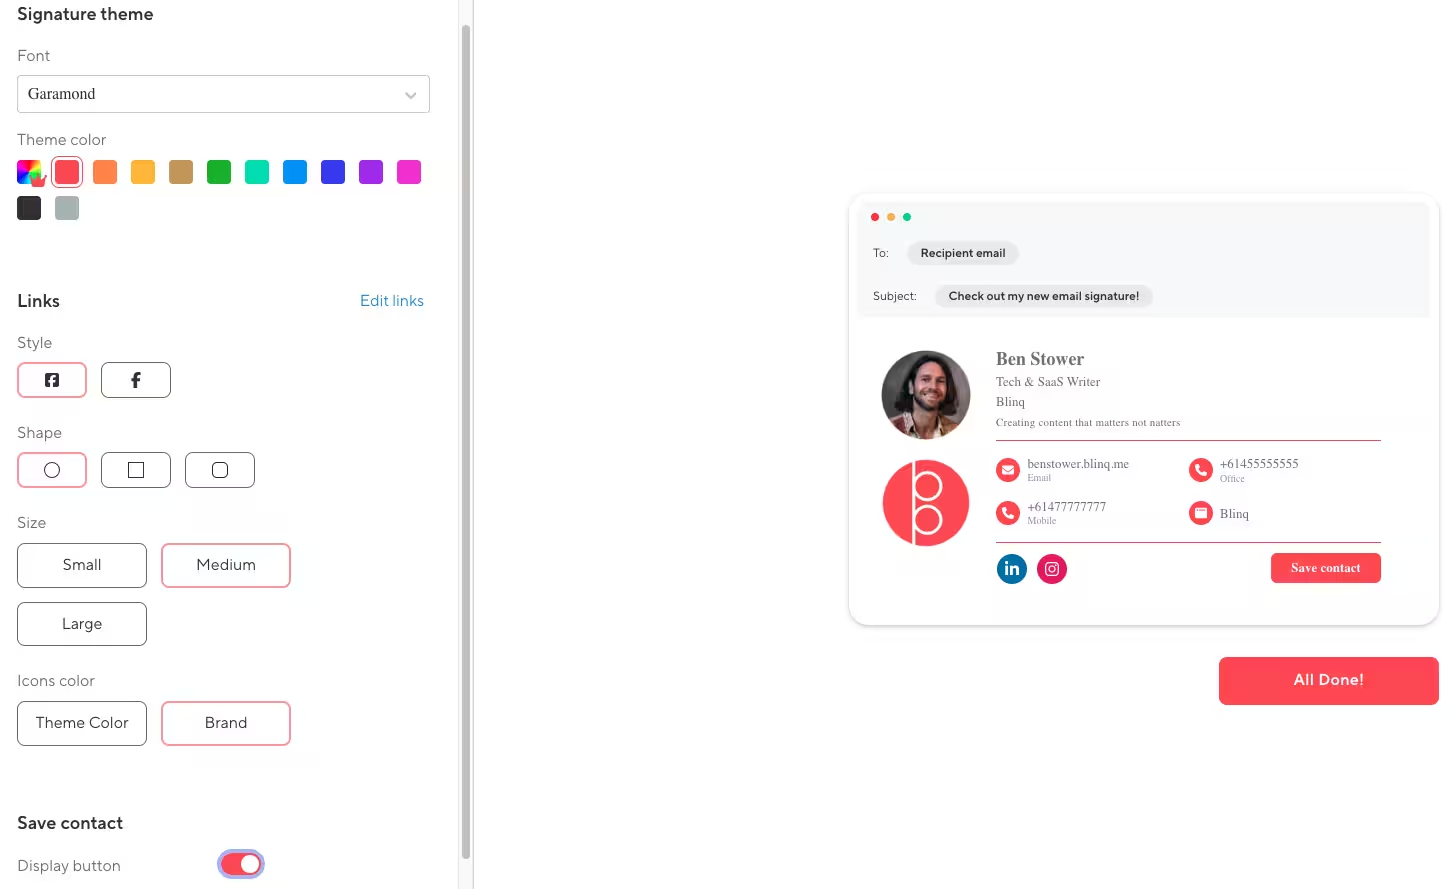
Step 5: Design
Now it’s time to tweak your design and make it more aligned with your own style or personality. Blinq Premium or Blinq Business account holders can select exact hex color codes, while anyone creating a free email signature can choose from 12 different colors. You can also select a font to match the style of your website or brand. Most of my branding uses Garamond, so I’ve chosen this as the font for my email signature.
When it comes to editing your links, decide how prominent you’d like them to be on your email signature. This will determine their style, size, shape, and color. I want my links to stand out but not dominate my signature, so I’ve chosen a full-color branded style in a medium circular shape. This way they match the rest of my signature’s elements while providing a pop of color at the bottom.
Your final decision for this step is whether or not you include a Save Contact button. This can be helpful if you’re doing a lot of cold emailing and want to give prospective clients a quick and easy way of adding you to their contacts. If you’re more established and have a lot of website, social, and payment platform links already, you may want to not include this additional button.
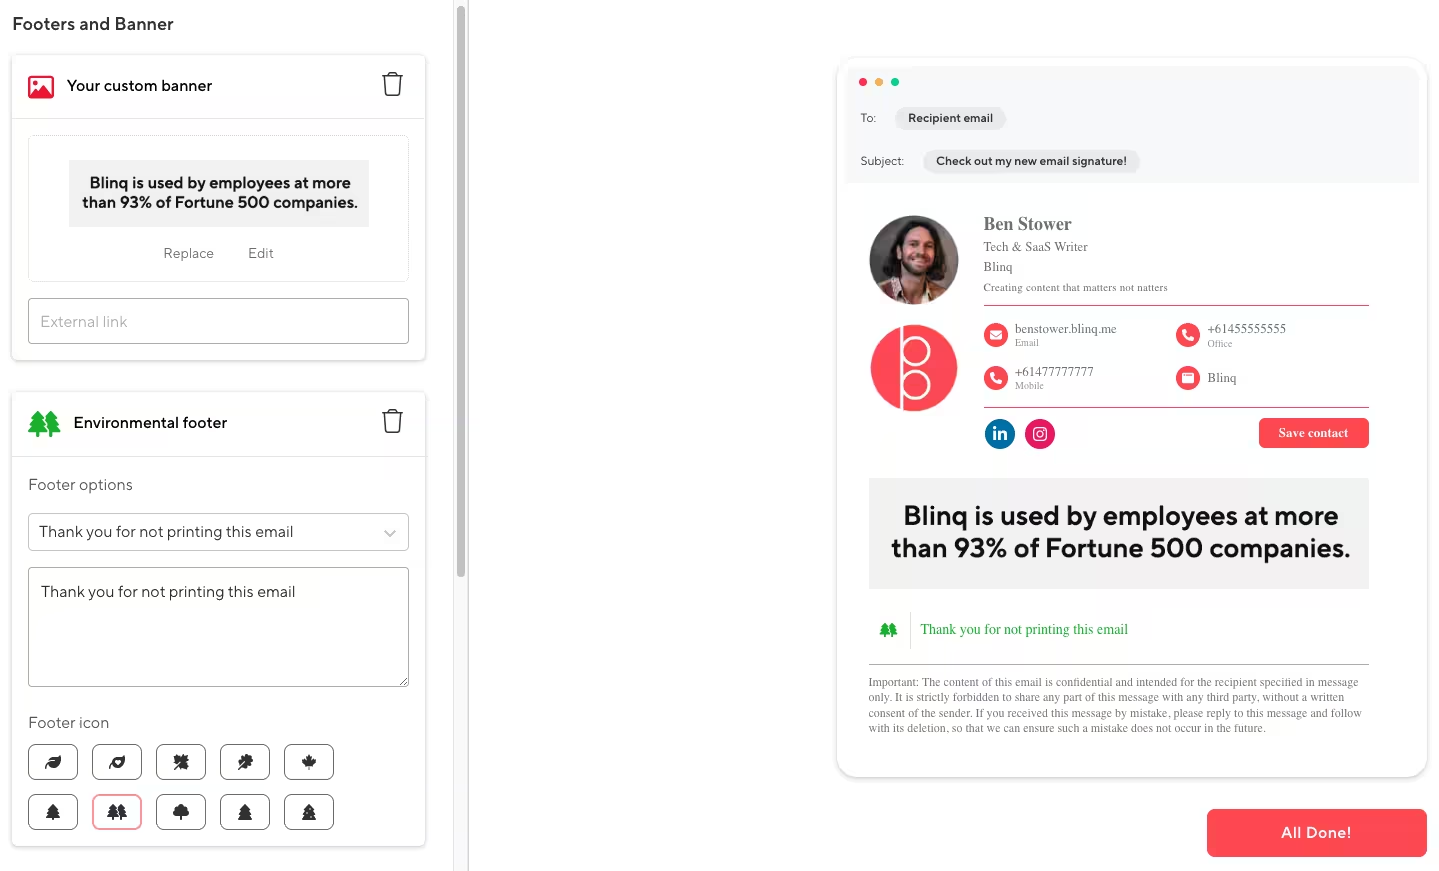
Step 6: Banners & Footers
This is another feature that makes Blinq one of the best email signature managers. Adding custom banners and footers can make your signature a richer content experience overall for your contacts.
A banner can be added to promote specials or certain services, even if that’s only for a period of time. You may simply want to add another sentence or two promoting your product or service, which is what I’ve done in the example below. Blinq’s dynamic email signature management software allows you to quickly set these banners up and change them as you need, even if you want to do that across all team members’ emails in your organization.
An environmental or legal footer is also important. Environmental footers allow you to express your brand’s environmental values, while legal footers are crucial if you’re email confidential information to clients that require additional protections. The Blinq email signature creator has pre-written environmental and legal footers, which I’ve used in the below example. You can also write your own if they don’t suit.
Step 7: Create
Now you’ve added and tweaked everything you’d like to include in your email signature, simply click All Done. You’ll be shown your final signature with all its elements. You’ll also be given the option of setting up your new signature with your Gmail, Outlook, Mail (Mac), and Mail (iPhone) accounts. Your screen should look like the below, with the four email platform options available to click.
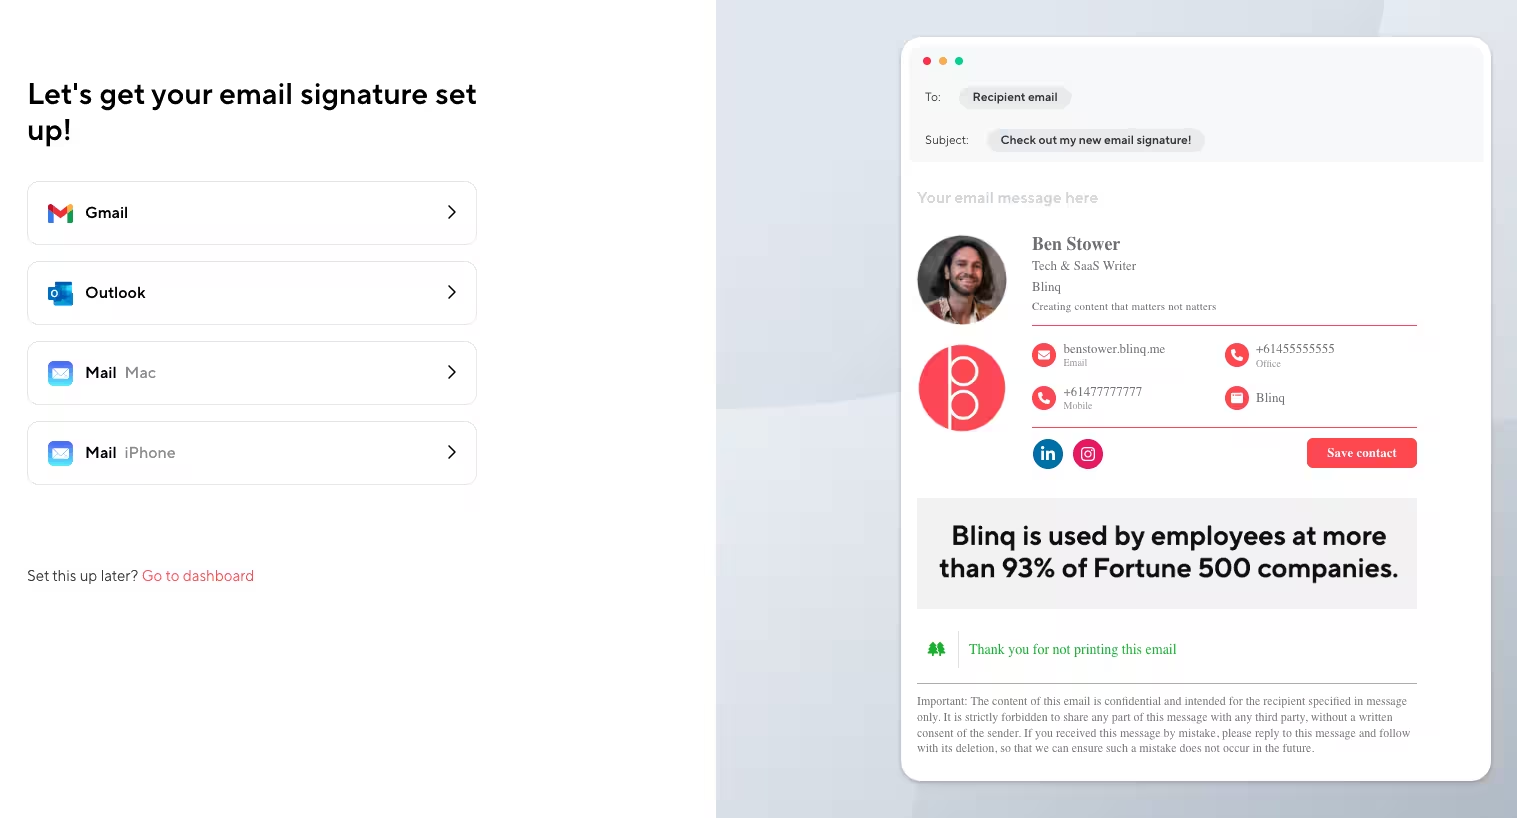
I’ll cover how you can integrate your Blinq email signature with these email platforms now.
How to Create and Manage a Blinq Email Signature in Gmail
Here’s how to transfer your new email signature to your Gmail in nine steps:
- Select the Gmail option on Blinq.
- Click the “Copy signature” button.
- Log into Gmail.
- Click the gear icon (top right) and select “See all settings”.
- Find the “Signature” section and create a new one.
- Name your signature.
- Paste your new Blinq email signature.
- Make it your Gmail’s default signature by choosing it in “Signature Defaults”.
- Click the “Save” button at the bottom of the page.
How to Create and Manage a Blinq Email Signature in Outlook
Here’s how to transfer your new email signature to your Outlook in six steps:
- Select the Outlook option on Blinq.
- Click the “Copy signature” button.
- Log into Outlook.
- Click the gear icon (top right) and select “Email Signature”.
- Paste your Blinq signature.
- Click the “Save” button (bottom right).
How to Create and Manage a Blinq Email Signature in Apple Mail
Here’s how to transfer your new email signature to your Apple Mail account. The process is a little different depending on whether you want it for your laptop or iPhone, so treat each option as its own process.
For Mac
- Select the Mail (Mac) option on Blinq.
- Click the “Copy signature” button.
- Open your Mac’s Mail app.
- Choose “Preferences” in the menu.
- Select the “Signatures” tab and unselect the “Always match my default message font” option.
- Paste your new email signature into the right-hand column. It won’t be visible in the column (an Apple Mail issue) but it will still appear when emailing.
- Click “OK”.
- Close the “Signatures” window.
For iPhone
- Select the Mail (iPhone) option on Blinq.
- Make sure the email address displayed by Blinq is correct for your Apple Mail, then click the “Send signature” button.
- Open the email from Blinq on your iPhone’s Mail app.
- Select everything in the email, including any greeting text.
- Click “Copy”.
- Open the Settings app.
- Select “Mail”.
- Find the Signature field and paste the copied signature.
- Shake your iPhone to display the signature. This isn’t a joke. It simply bypasses an odd issue with the Mail app.
- When the “Undo Typing” pop-up appears, click “Undo”.
- Delete any additional text from the Blinq email that isn’t part of your signature.
- Close Settings and send an email to test. Your signature should now appear.
How to Manage Your Interactive Email Signature with Blinq
Once you have your Blinq account set up (either free or via one of the packages), you can access all your email signatures, digital business cards, virtual meeting backgrounds, and other business solutions via the online dashboard. Simply log into your Blinq account on our website to access the dashboard.
Your dashboard should look a little something like this:
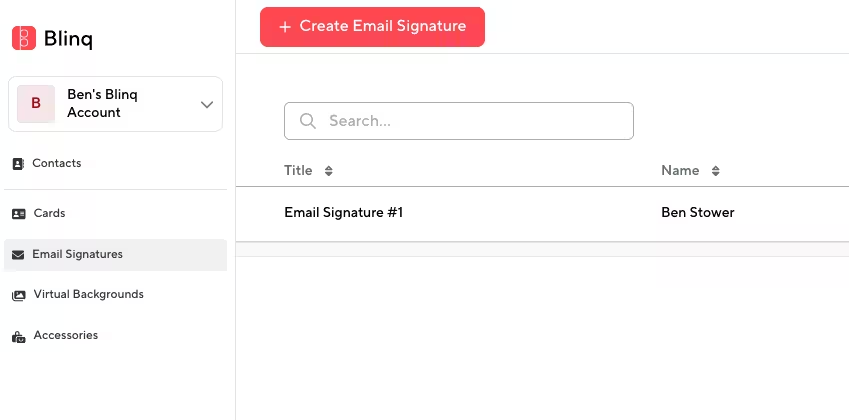
If you want to edit your current email signature, click on the name of your signature in the Title column. This should take you to the signature creator dashboard, where you can remove or update all the elements we covered above.
How to Manage Your Blinq Email Signature on Gmail, Outlook and Mail
If you’ve already copied your Blinq email signature across to your Gmail, Outlook and/or Mail accounts, you don’t need to copy it again. Even if you make updates in Blinq, these changes will automatically update on your Gmail, Outlook, and Mail. This is just one of the ways Blinq makes email signatures more dynamic and integrated, saving you time and headaches when you’re wanting to make small changes for just your signature or even across your entire company.
How Easy is it to Create and Manage Your Professional Email Signature with Blinq?
It would be easy for us to just tell you it’s easy, but you don’t have our word for it. As you can see from the seven-step process outlined above, it shouldn’t take you much time or effort creating your email signature. And when you want to add that signature to your email platform (e.g. Gmail or Outlook), you only need another eight or so steps. That’s a small process for a permanent change that can help your team stay consistent and present your brand in the best-possible way.
As for managing your email signatures, the way Blinq copies your signature across to your email platform means any updates you make in Blinq reflect automatically on your Gmail, Outlook, or Mail account. It even updates old emails you’ve already sent. That way, important information like your contact details never appear outdated. If you have a Blinq Business or Blinq Enterprise plan, you can also control all your teams’ signatures through a central admin and sync them with Google Workspace. All it takes is one change to update everyone’s signature.
If it sounds quick and easy, it’s because it is quick and easy. Here are some testimonials from real-world professionals on G2 talking about how easy Blinq makes email signatures.
“It’s an effective and fast way to share all contact details with clients and potential clients. It’s great to have as an email signature, very polished look with the head shot option and one-click buttons to socials.”
G2 review by a Performing Arts Professional
“I also tried out and created a signature line for emails. What I like about this is that it is dynamic and if contact info should be changed on the backend, when the email is viewed again, the new info displays.”
Tips for Creating an Effective and Professional Email Signature
Not all email signatures are created equal. Some of them stand out for the right reasons, others for the wrong reasons. Others barely even get noticed at all. When creating an email signature with Blinq, you want yours to be in the first group. Here are some ways to ensure your signature gets noticed and remembered for the right reasons.
- Make sure your chosen font style and size will display clearly on small- and large-screen devices. If you need to, test out your signature on both before committing.
- Try to choose a font and color scheme that matches your brand’s.
- Don’t be afraid of white space and avoid cramming too much into your signature.
- Use high-quality images for your profile photo and brand logo.
- Prioritize the most important information at the top of your signature.
- Only include necessary information – don’t add elements just because you can. Everything on your email signature should have a purpose.
- Incorporate social or payment platform links to promote connection or expedite transactions.
- Use your banner to promote a specific CTA for seasonal or temporary promotions. This can help make your email another marketing channel.
Benefits of Creating an Interactive Email Signature with Blinq
Should You Create an Email Signature with Blinq?
For many people, creating a Blinq email signature has made life a little bit easier. This is a big reason why Blinq is the top-rated email signature software on G2 based on thousands of appraisals by professionals in numerous industries. Many of these people have also found their Blinq email signature has made it easier to connect and expand their network, keep their business details up to date, manage multiple email accounts across their business, and even turn their emailing into marketing with more opportunities to get conversions.
If all of that sounds like something you would like to add to your professional life, creating an email signature with a professional and dynamic tool like Blinq could be a good option. If you’re still not sure, you could explore some of our other solutions. We also provide digital business cards, CRM integrations, and virtual meeting backgrounds.
Frequently Asked Questions
Why is a photo important to add when creating an email signature?
Numerous studies have been published on the importance of face-to-face contact in our everyday life. Emails may be one of the forms of communication furthest from face-to-face, but they don’t have to be entirely void of human connection. Adding a photo to your signature gives your emails an element of face-to-face communication.
They’ll never be the same as actually meeting someone in a room, but a smiling photograph can help your recipients better connect with you and your message. A photo is especially helpful if your recipients don’t know you – it gives them a clearer impression of who you are and helps establish trust.
Do I need to add my company’s logo to my signature?
No, you don’t need to add it, but it can help make your email signature more professional. For many people it makes sense to add their company logo because it’s yet another way to promote your brand and increase visibility. If you’re sending a lot of emails to people who don't know your brand yet and you don’t have a logo, you’re missing out on free, passive marketing that could generate more interest or consideration in your company.
What’s the benefit of social media links in an email signature?
If you have social channels that present your brand in a positive way and boost your credibility, they can be a valuable addition to your email signature. It’s an easy way for email recipients to check out your brand and services. They can also gauge your company’s popularity based on followers and interactions. At the very least, they boost your credibility as a professional and make your email signature more interactive.
How does adding a CTA to my signature help with marketing?
Imagine if, when you were chatting to someone, they were wearing a shirt that read “Browse our products online”. It would be a bit awkward and ineffective. Emails don’t have that problem. By adding a CTA banner or button link at the bottom of your email signature, you can turn this communication channel into a passive marketing channel.
Your banner could promote a seasonal sale, suggest people visit your site, or simply boast about your brand’s latest milestone. Either way, it’s a great way to potentially increase site visits and conversion with little to no investment.
How do I make my email signature look professional?
There are a few key elements to include when creating a professional email signature, including:
- Contact information (i.e. full name, job title, company name, contact details etc.)
- Legal or environmental disclaimer (if needed)
- Profile photo and company logo
- Social media or payment platform links
- A CTA or promotional banner
- Website link
- Unified color and font schemes

