

.avif)


.avif)


.avif)

Key Takeaways (TL;DR)
How to add your Blinq email signature to Outlook
Adding your Blinq email signature to Microsoft Outlook couldn't be easier. Follow the steps below to get started and give your emails an immediate boost with custom branding, social links and more.
Step-by-step Instructions:
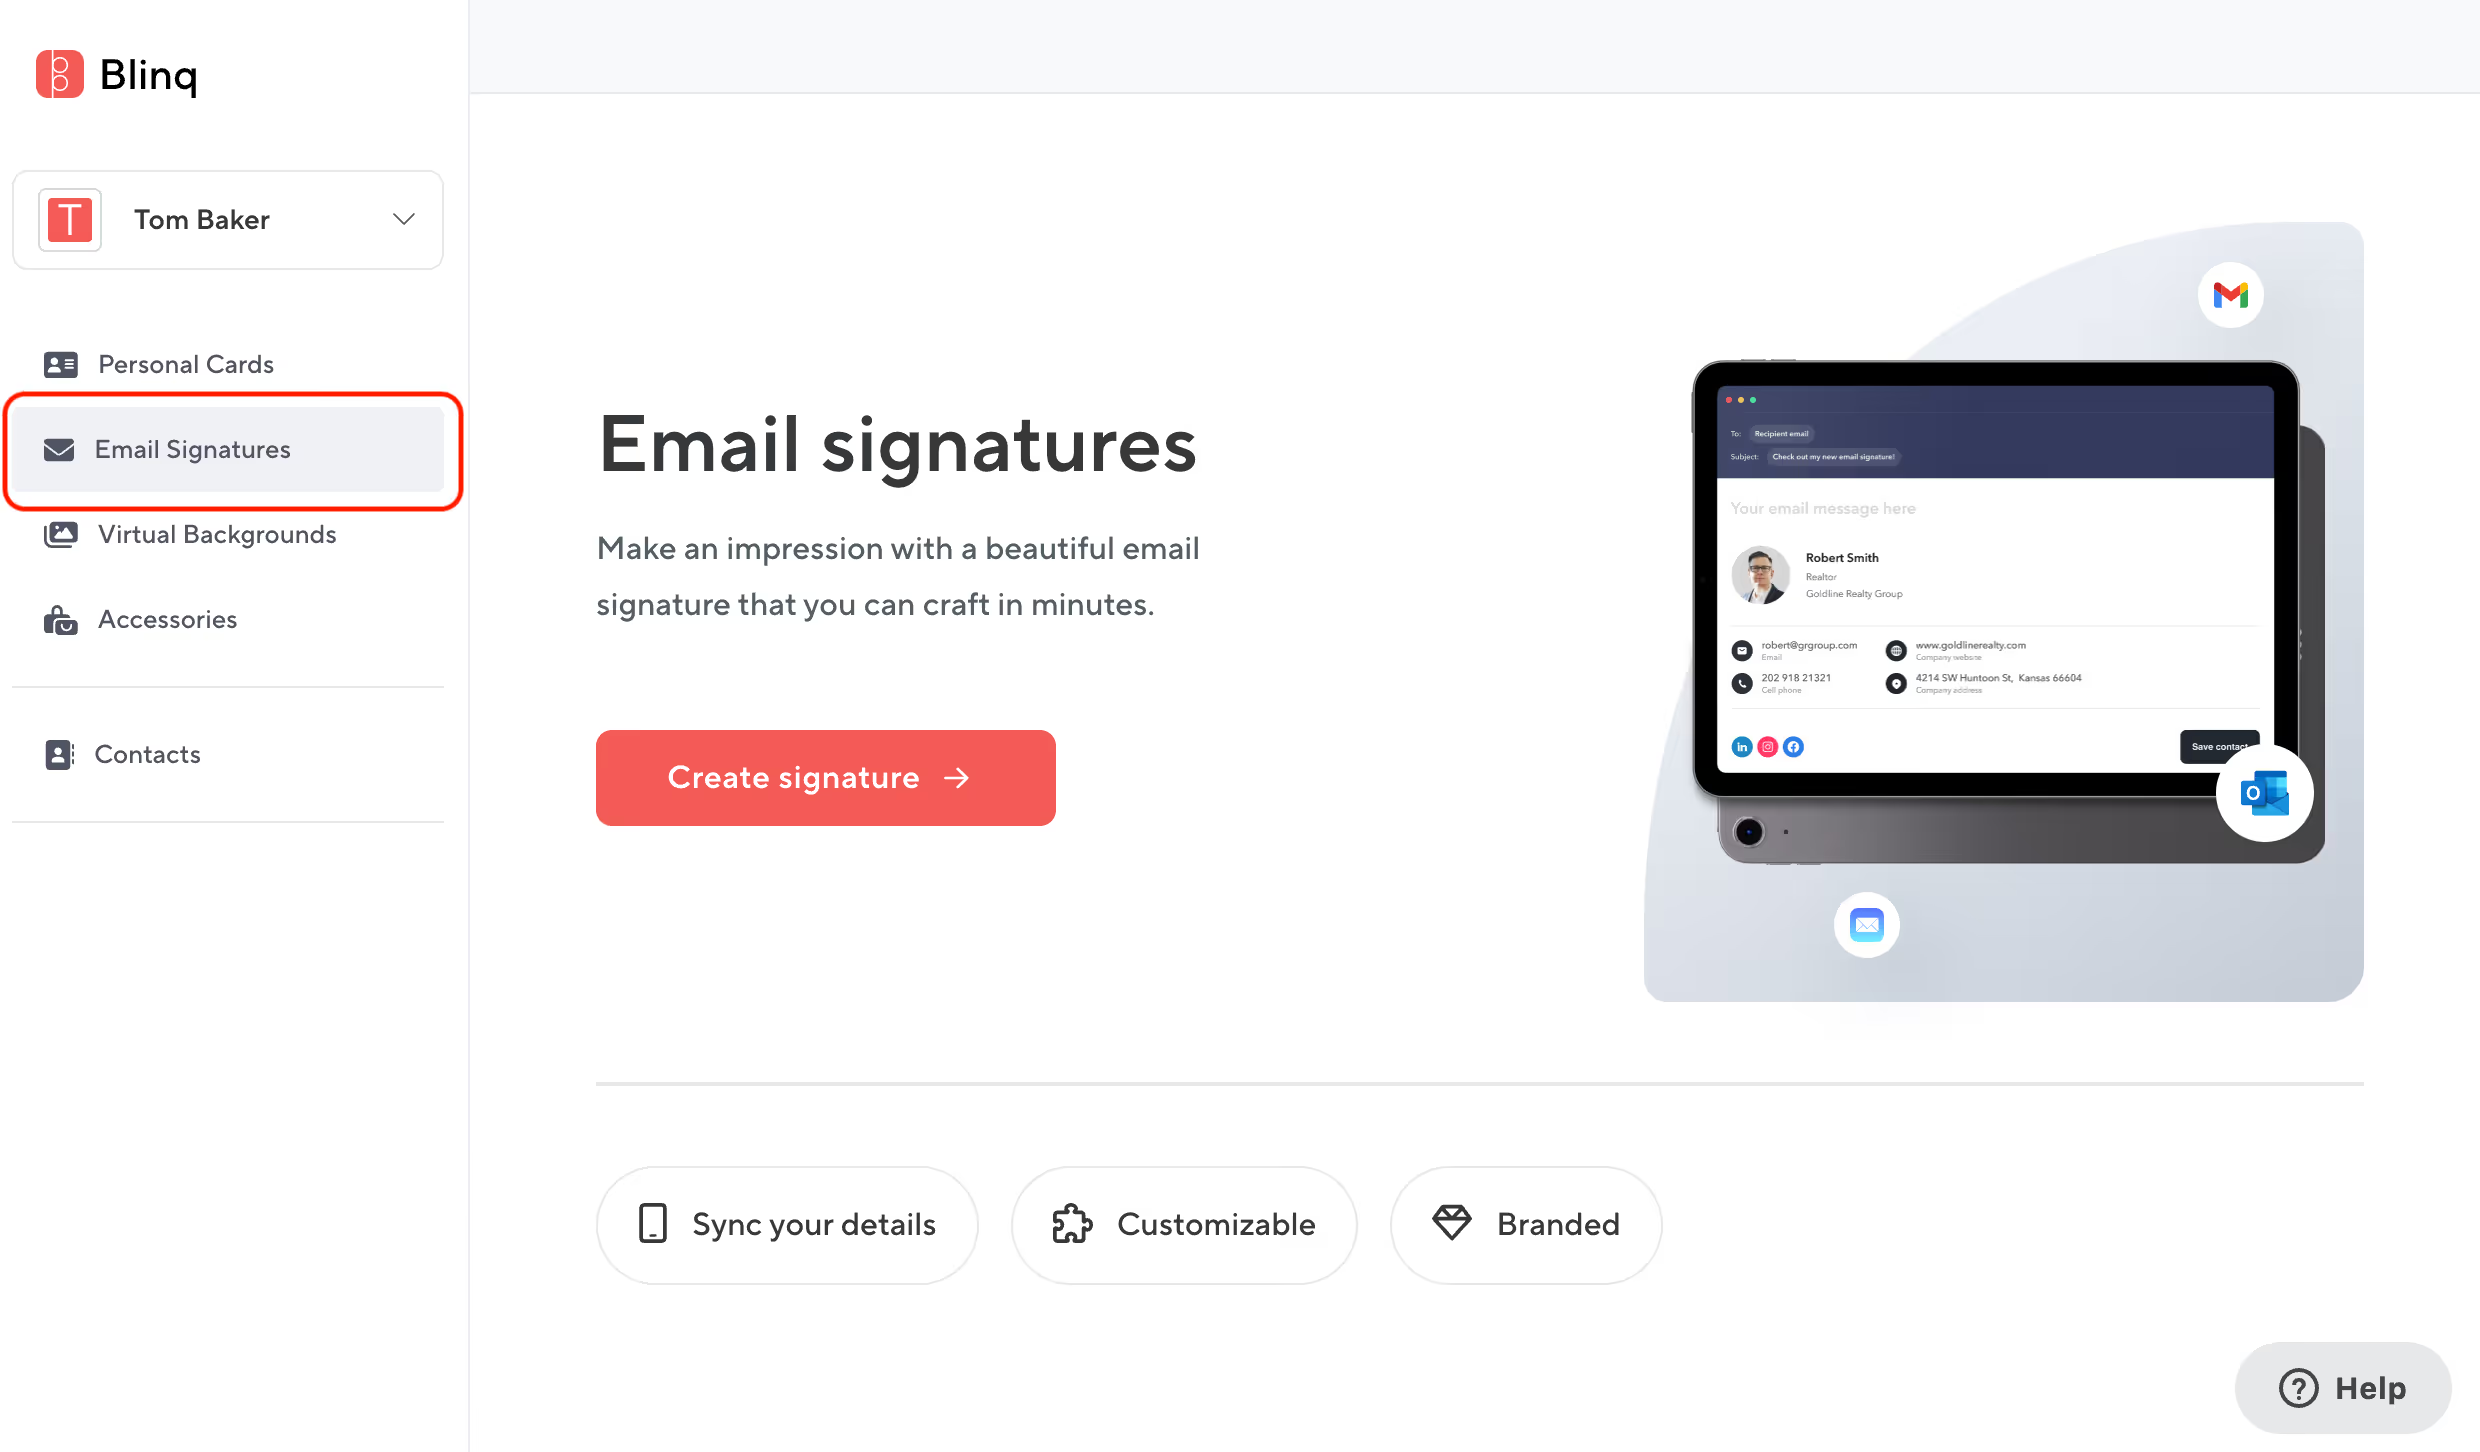
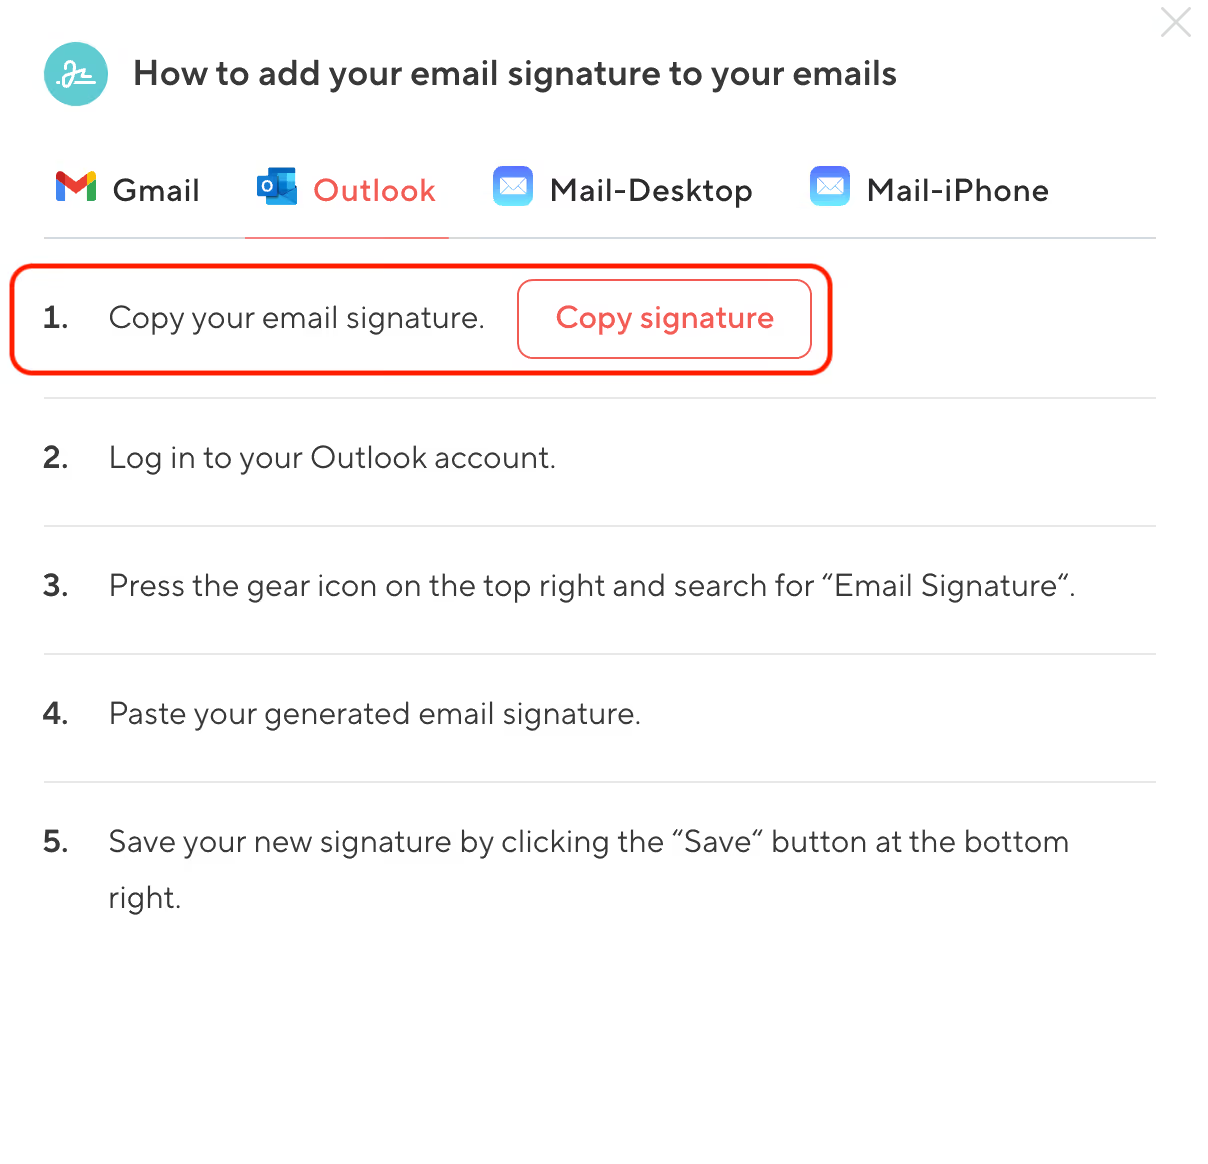
Step 1.
Log into Blinq on a computer to access the Blinq web dashboard and select Email Signatures from the left.
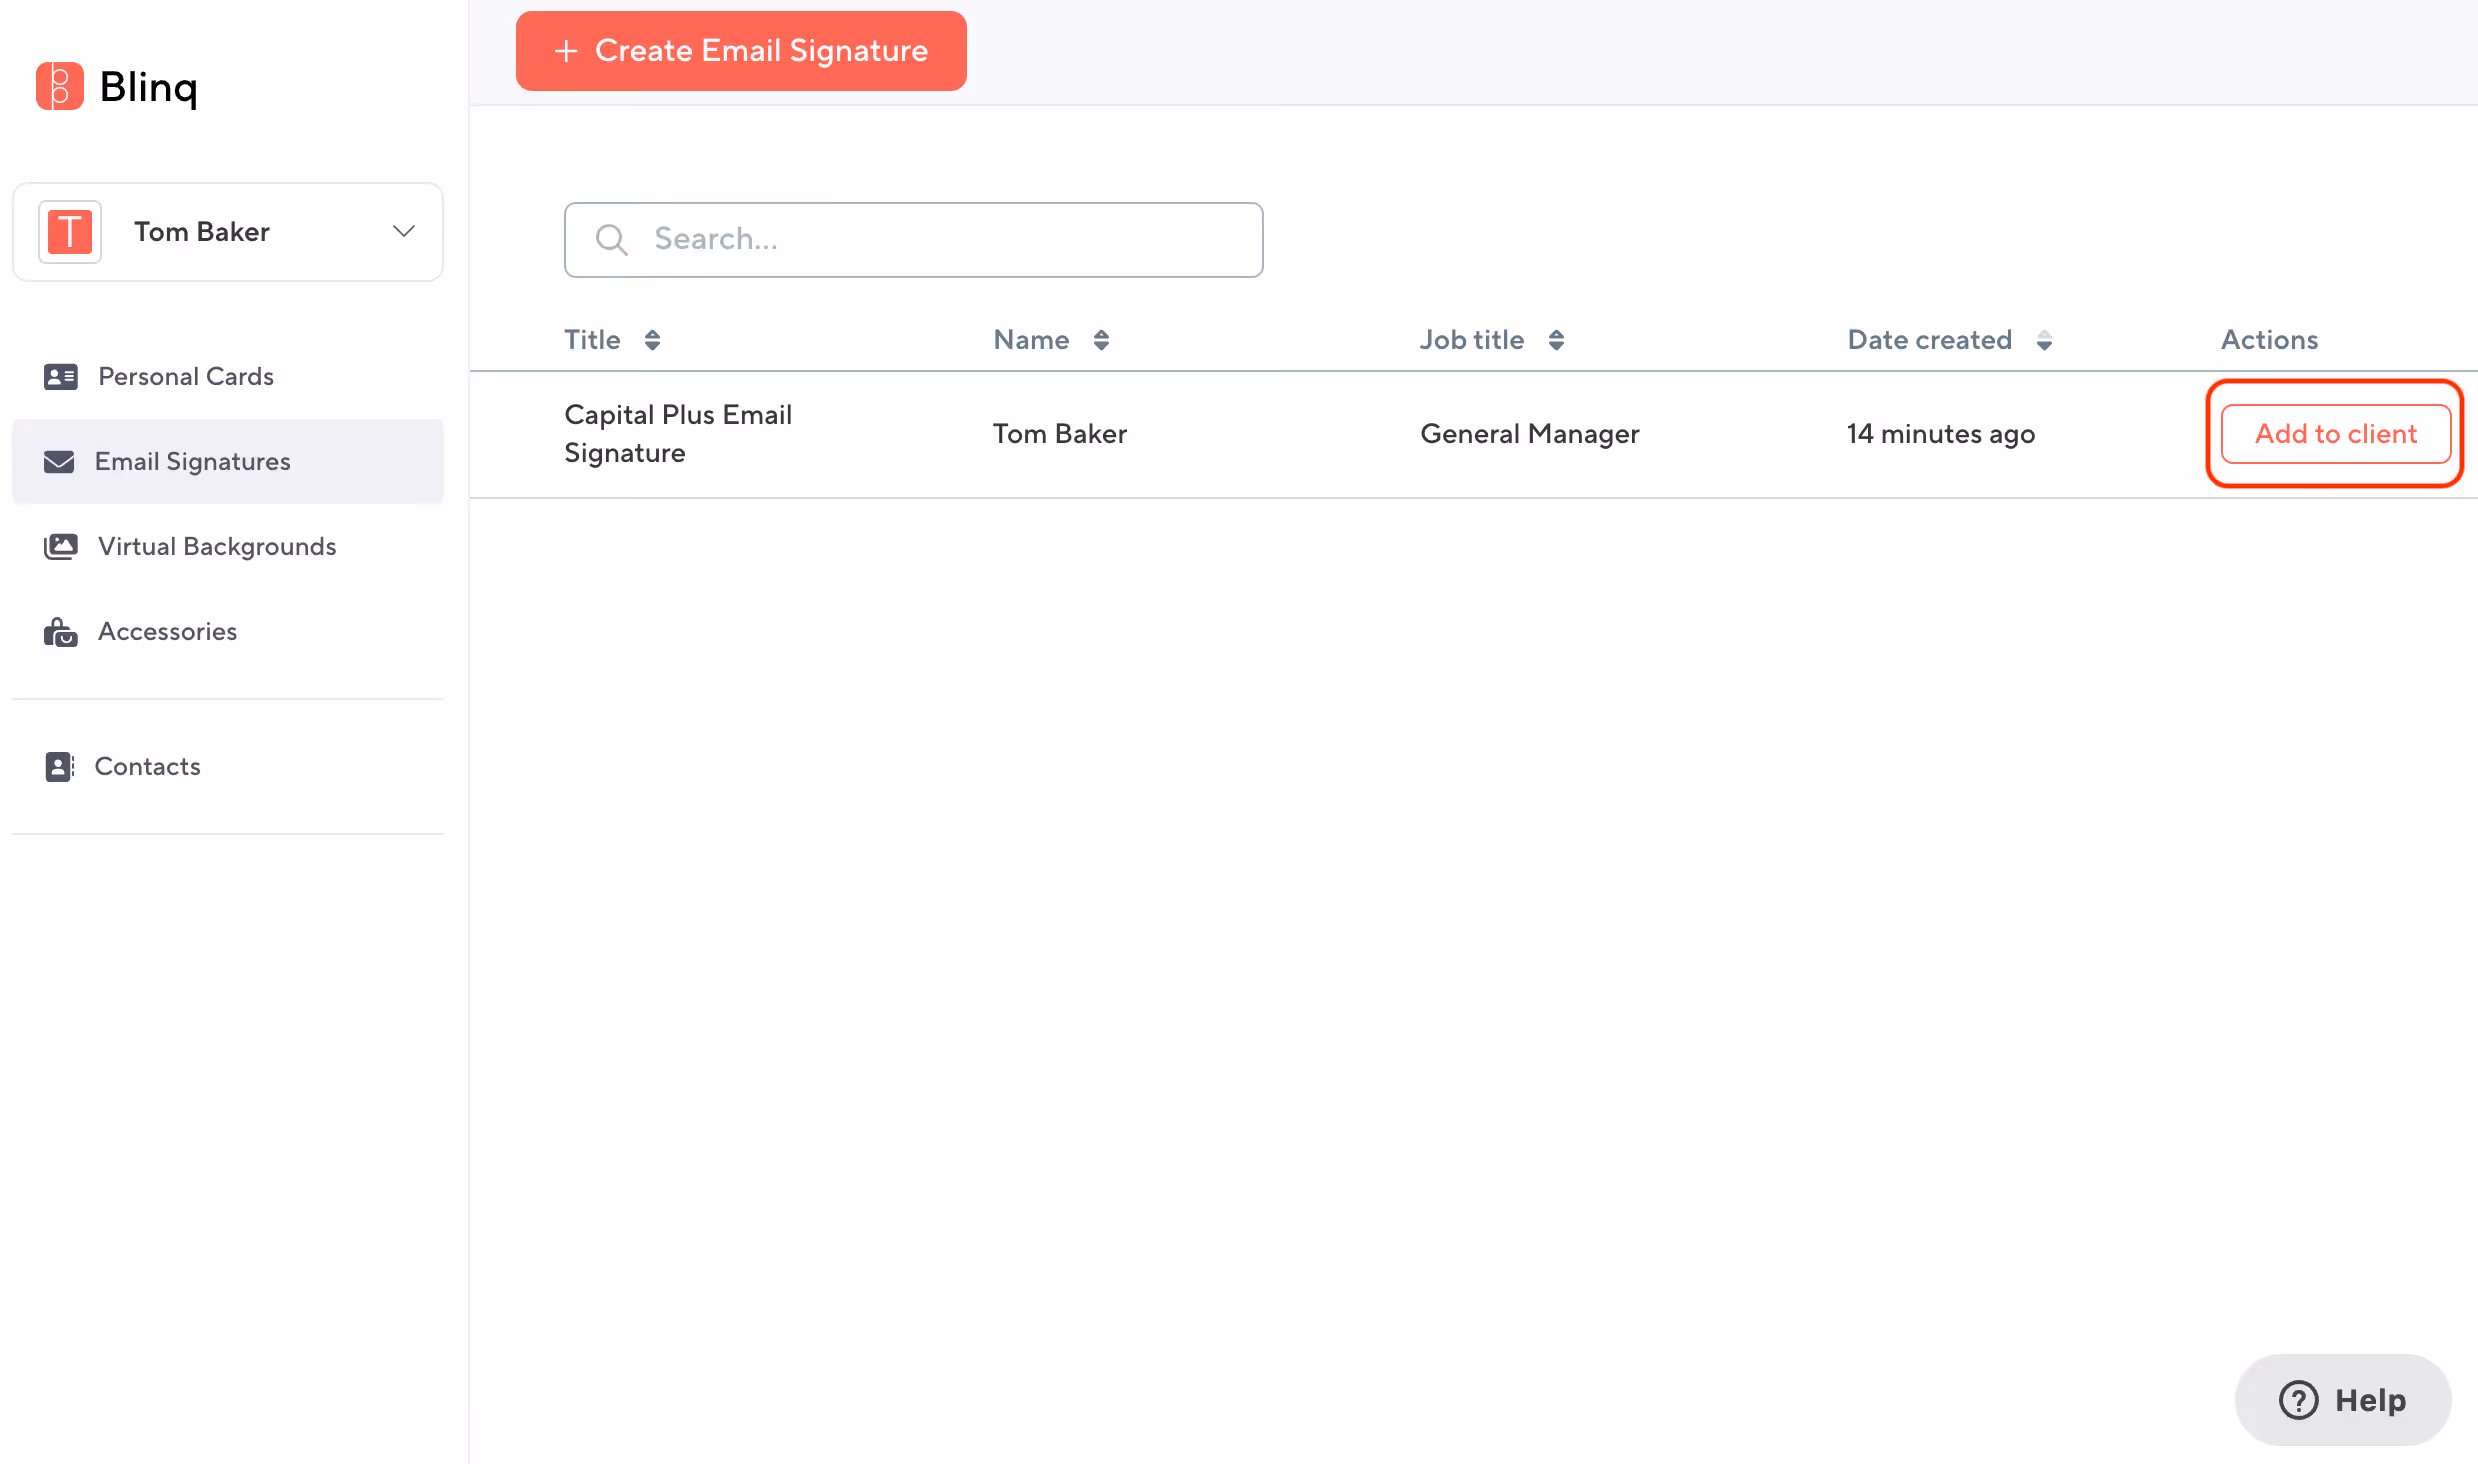
Step 2.
If you email signature has already been created either by yourself, or by your team if you are a member of a Business plan - click 'Add to Client'
If you haven't yet got an email, click 'Create Email Signature' in the top bar to get started, see our setup instructions here.
Step 3.
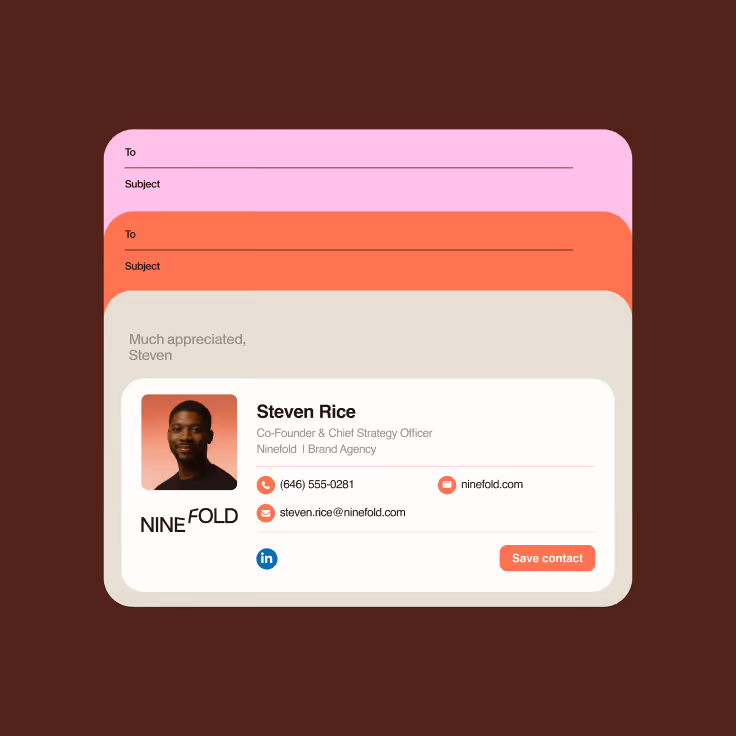
From the pop window, click 'Copy signature'
Step 4.
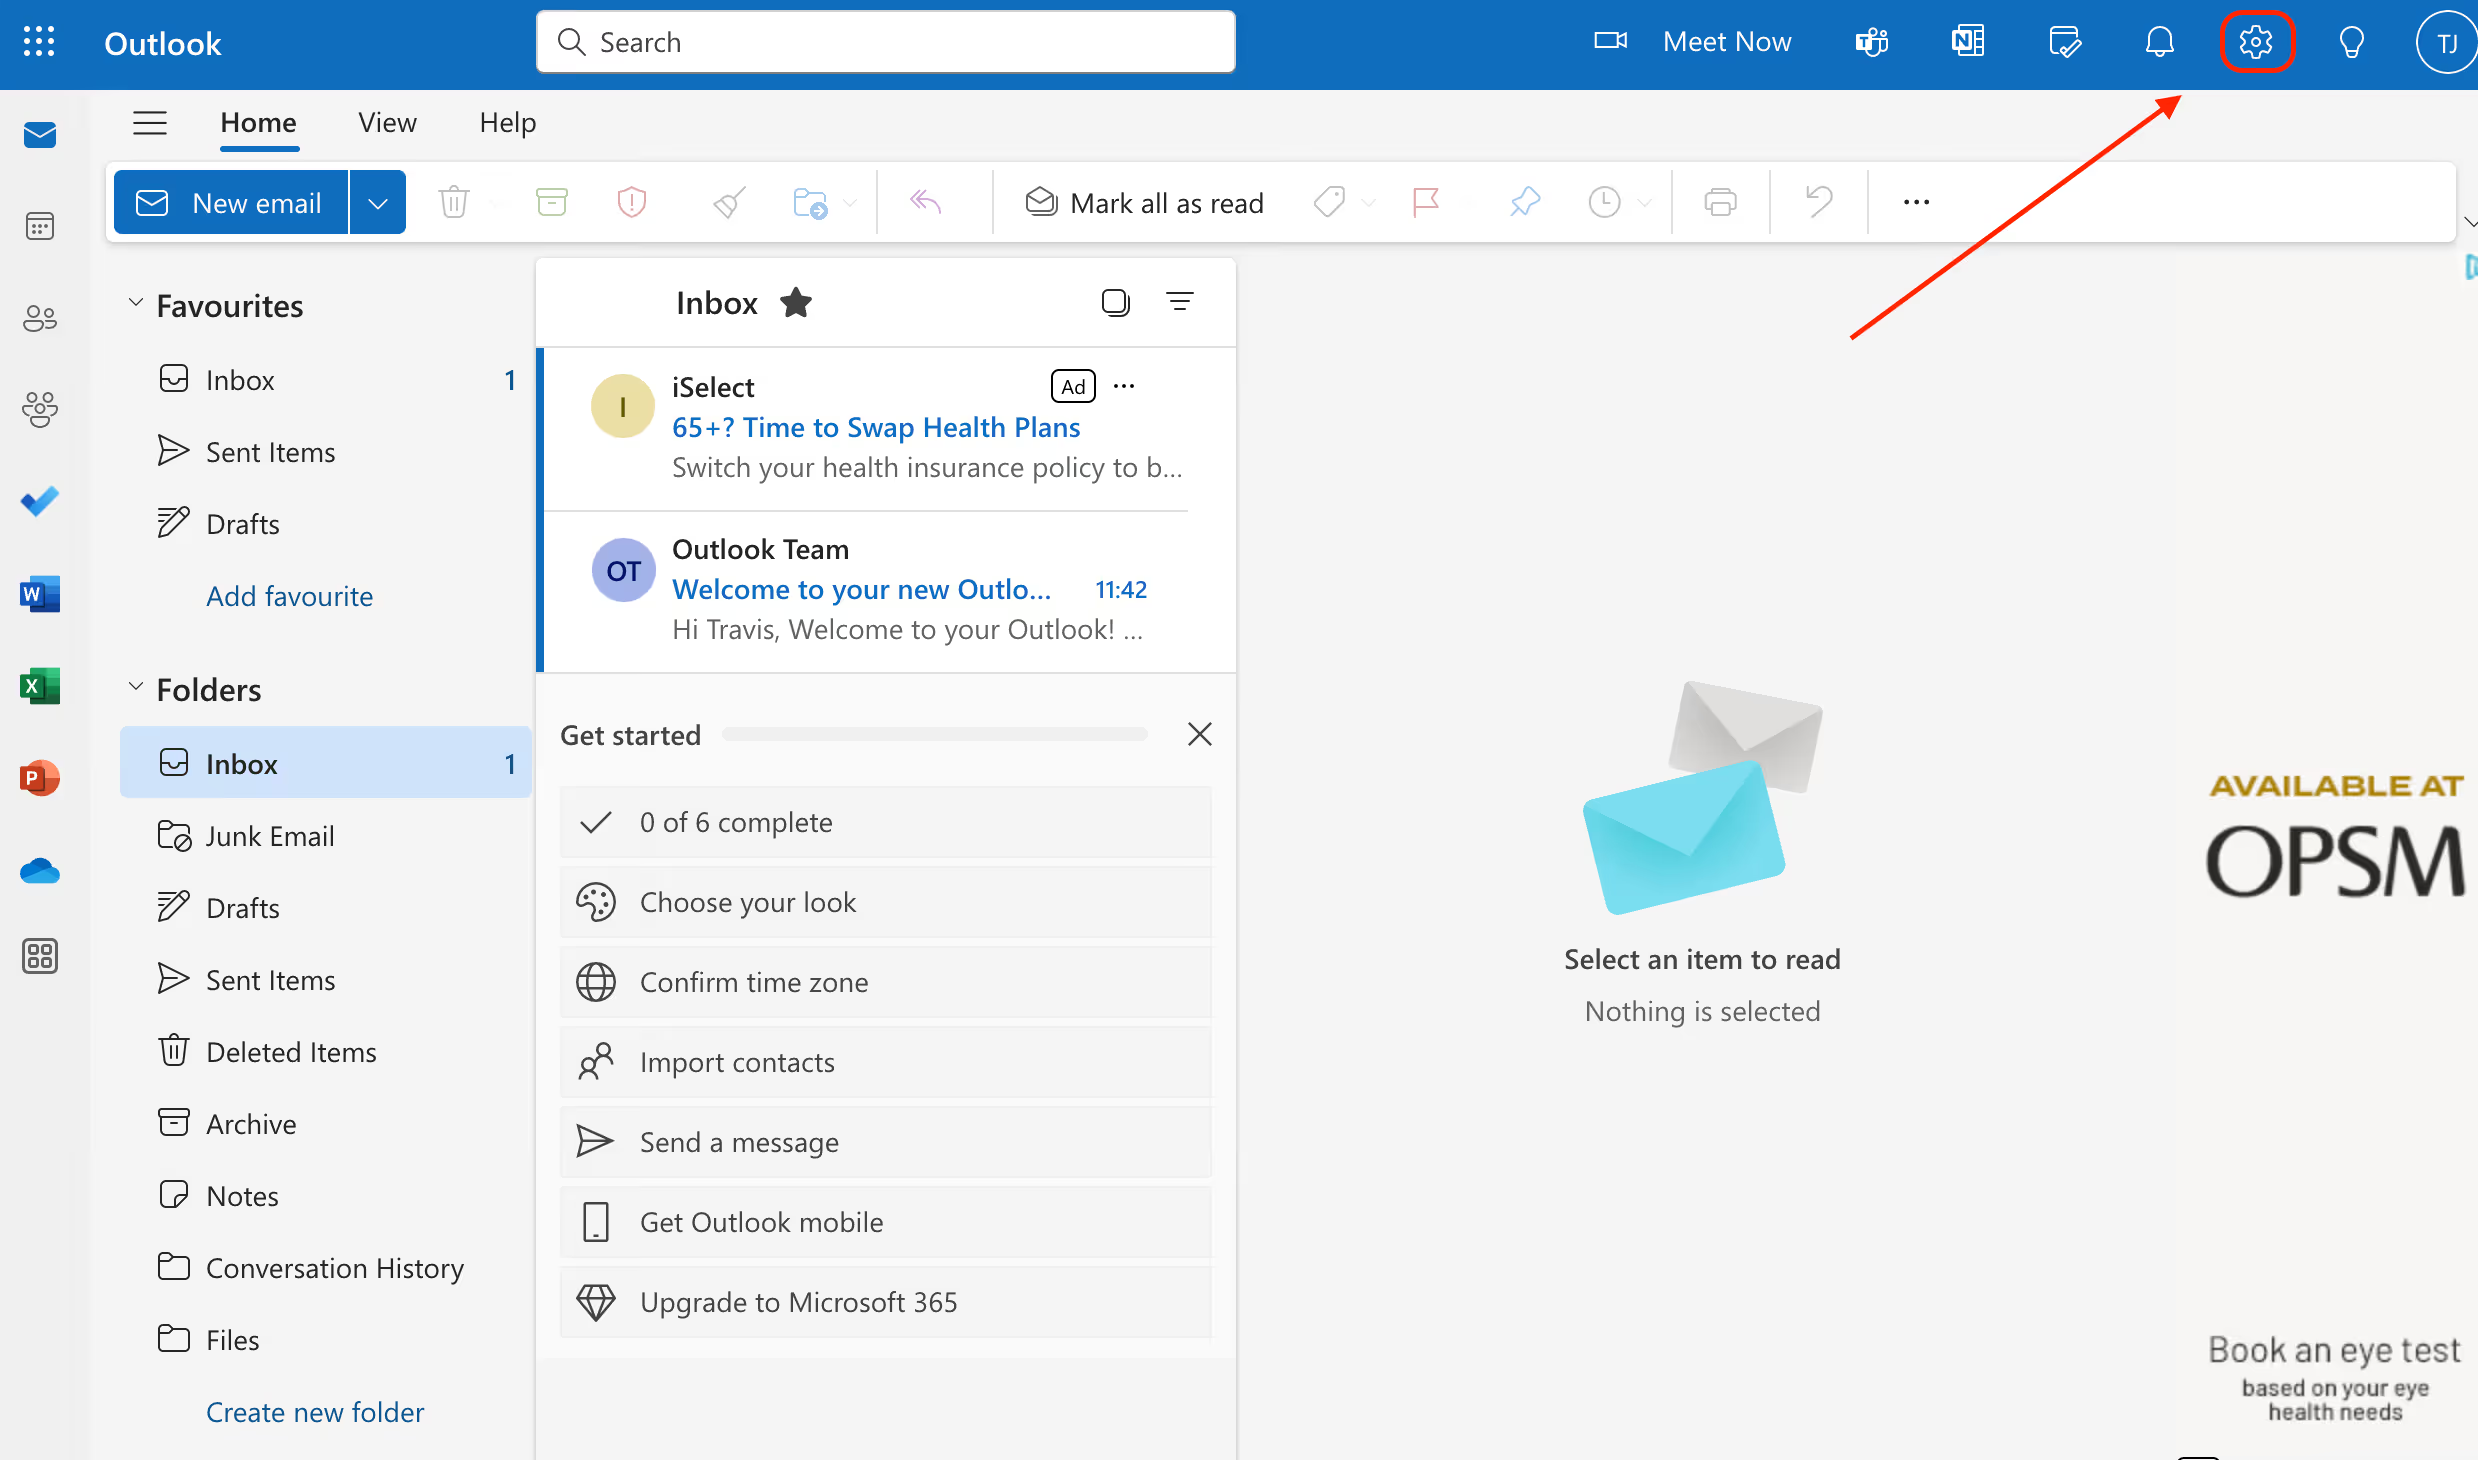
Log into your Microsoft Outlook account from a new tab in your browser, click on the setting cog in the top right corner.
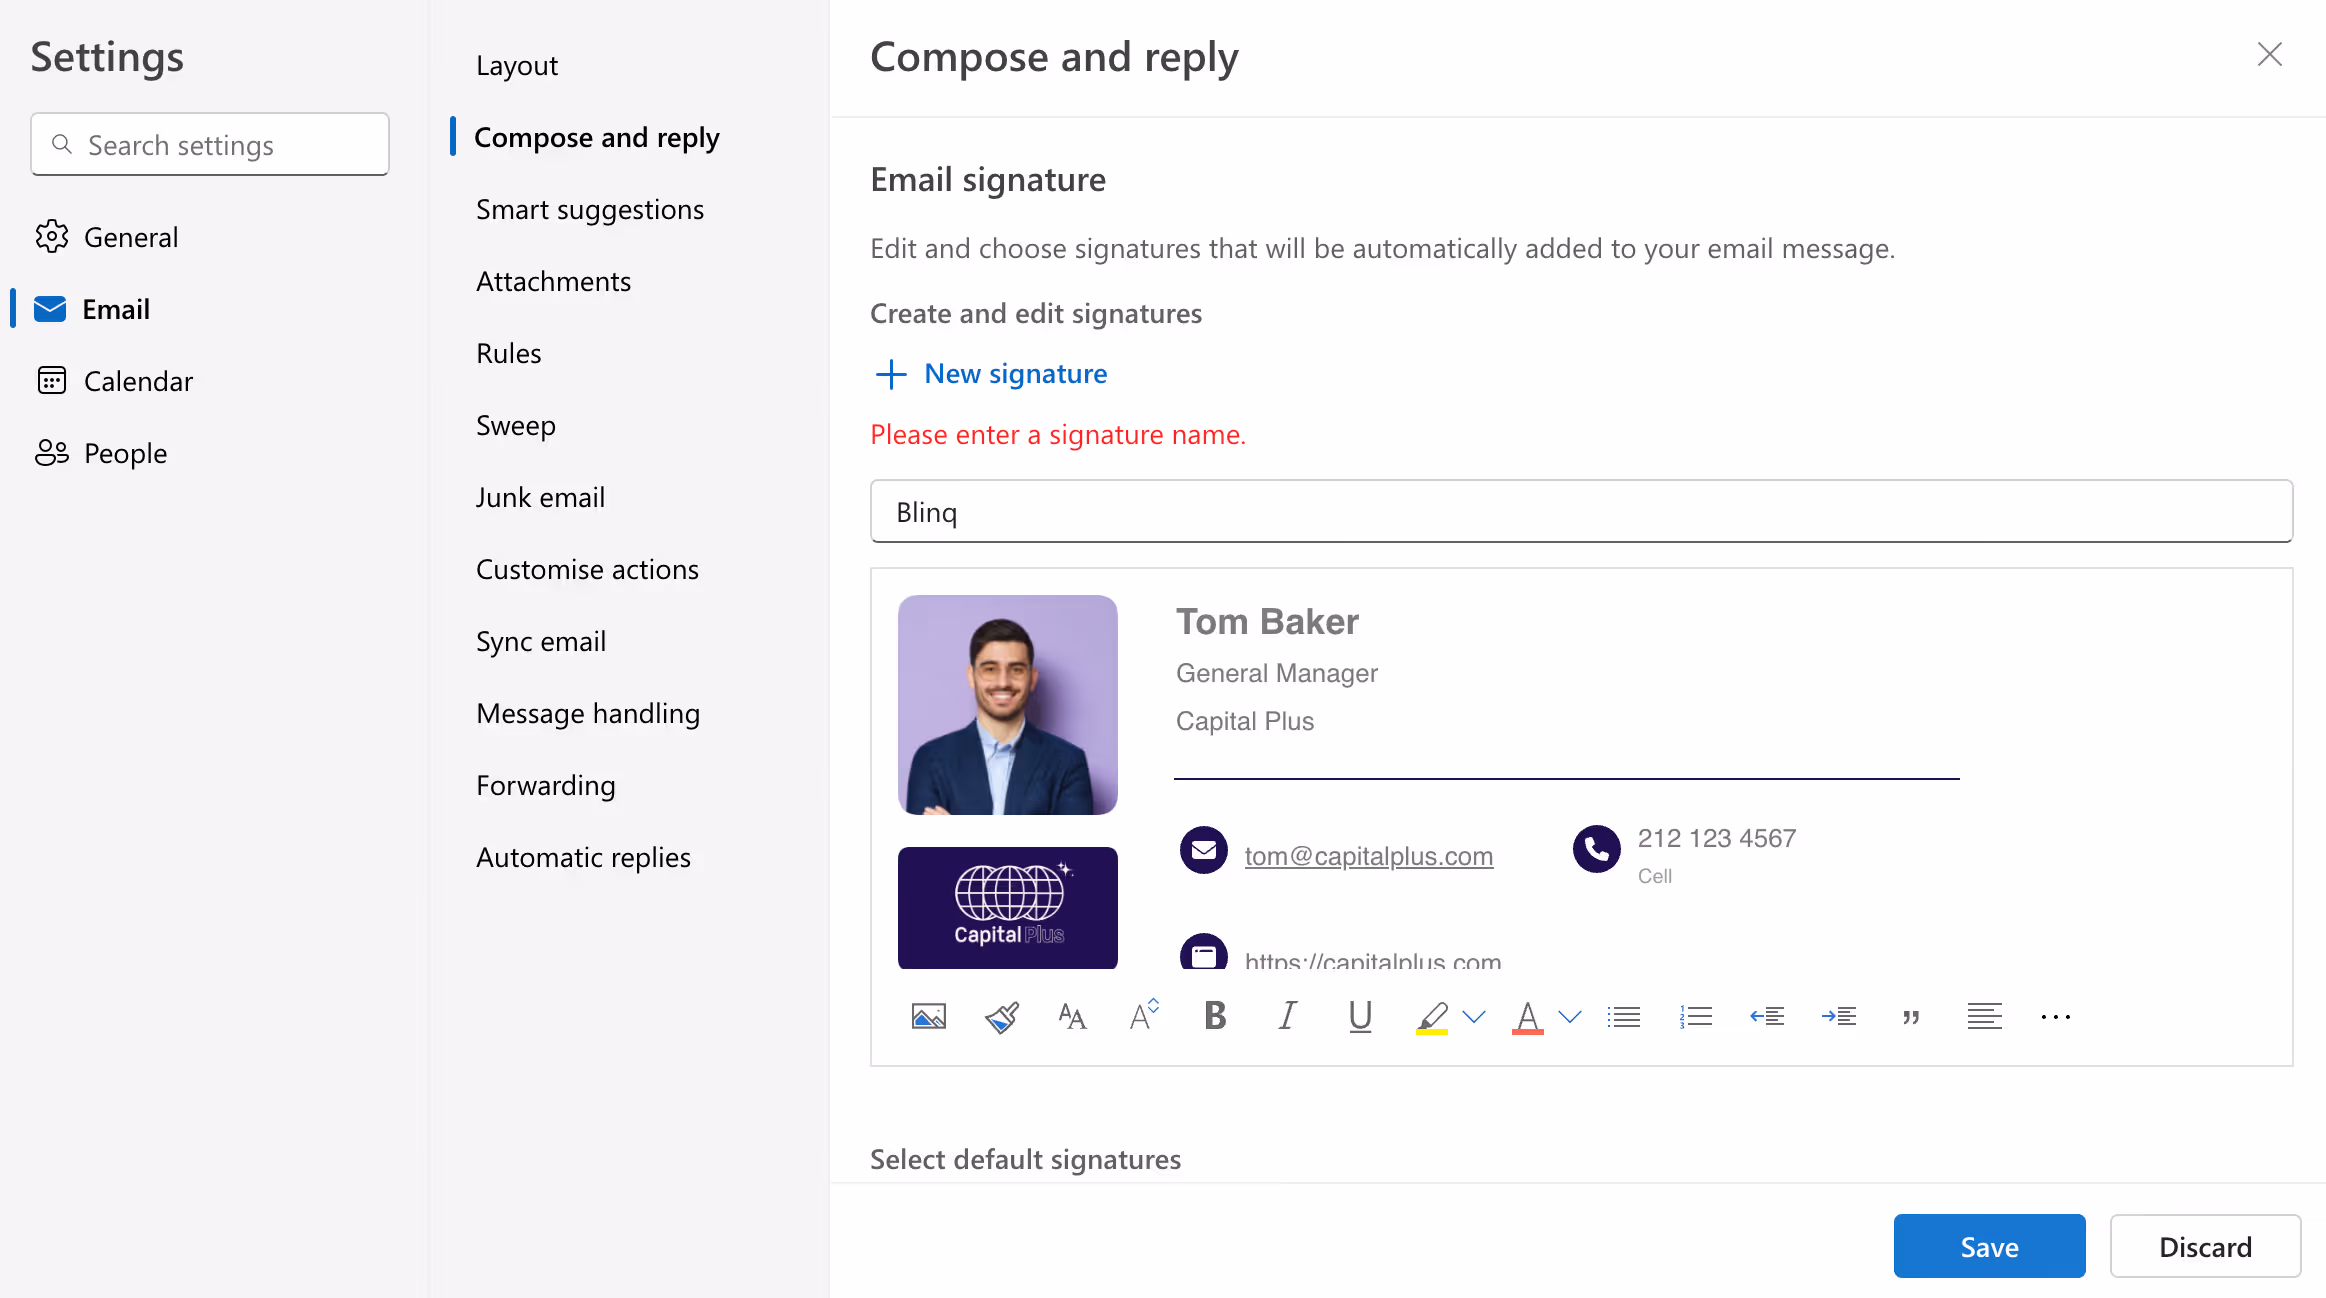
Step 5.
Make sure you have Email selected in the left-hand menu and Click 'Compose & Reply'. Paste your Blinq email into the box and give it a name, we recommend Blinq.
Step 6.
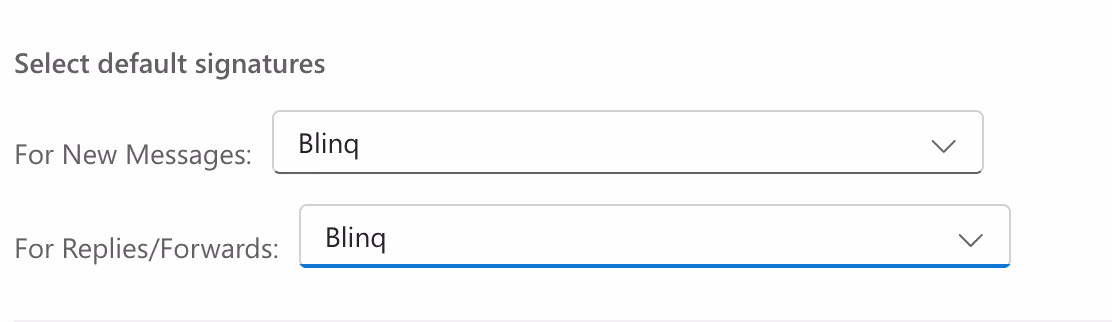
Make sure that your Blinq email signature is selected as default for both new messages and replies/forwards.
Step 7.
Click Save and your email signature is ready to use!

